How to Generate Accessibility Statements with Accessiy
The Accessiy plugin simplifies creating or linking an accessibility statement for your WordPress site, ensuring compliance with standards like WCAG and EAA. Follow these steps to generate or configure an accessibility statement.
Step 1: Install and Activate Accessiy
Ensure the Accessiy plugin is installed and activated. Refer to How to Install & Activate the Accessiy WordPress Plugin for detailed instructions.
Step 2: Access the Statement Settings
- Go to your WordPress admin dashboard.
- Navigate to Accessiy > Settings.
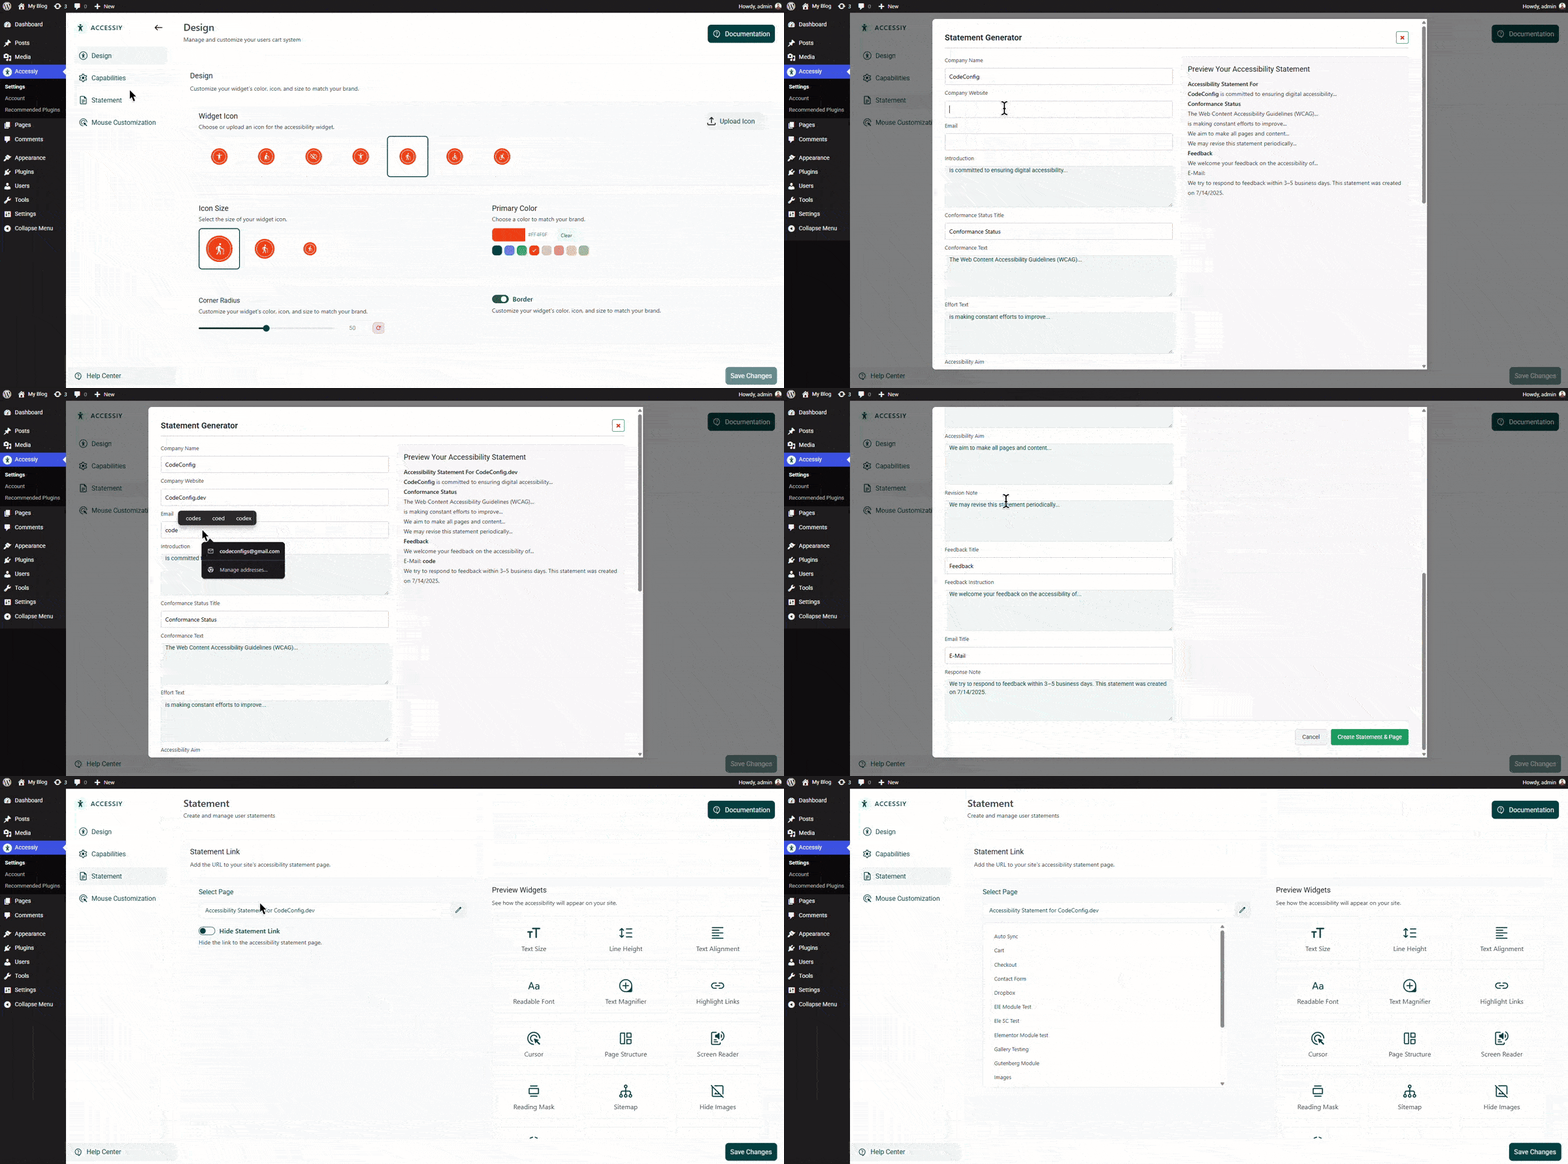
- Click the Statement tab.

Step 3: Generate or Link a Statement
You will see two options in the Statement tab:
- Yes, I Need One: Select this to generate a new accessibility statement automatically. Accessiy will create a compliance-ready statement for your site.
- No, I Already Have One:
- Choose this if you have an existing accessibility statement.
- Click Select Page and choose the page containing your statement.
- Optionally, enable the Hide Statement Link setting at the bottom to remove the statement link from the Accessiy accessibility widget panel.
Step 4: Save and Test
Save your settings and visit your website to verify the accessibility statement is displayed or linked correctly in the Accessiy toolbar.
Compatibility Note
If using caching plugins like WP Rocket or NitroPack, clear the cache after configuring the statement. For Elementor users, regenerate CSS files via Elementor > Tools > Regenerate CSS & Data.
Support
For help, contact our 24/7 support team at https://codeconfig.dev/contact/ or explore Documentation and Video Tutorials.


