How to Create List Module Using Google Drive?
The List Module provides a structured way to display Google Drive files on your WordPress site. Users can view, download, and edit documents directly within WordPress, making file management and collaboration easy and efficient.
Step 1: Add List Module
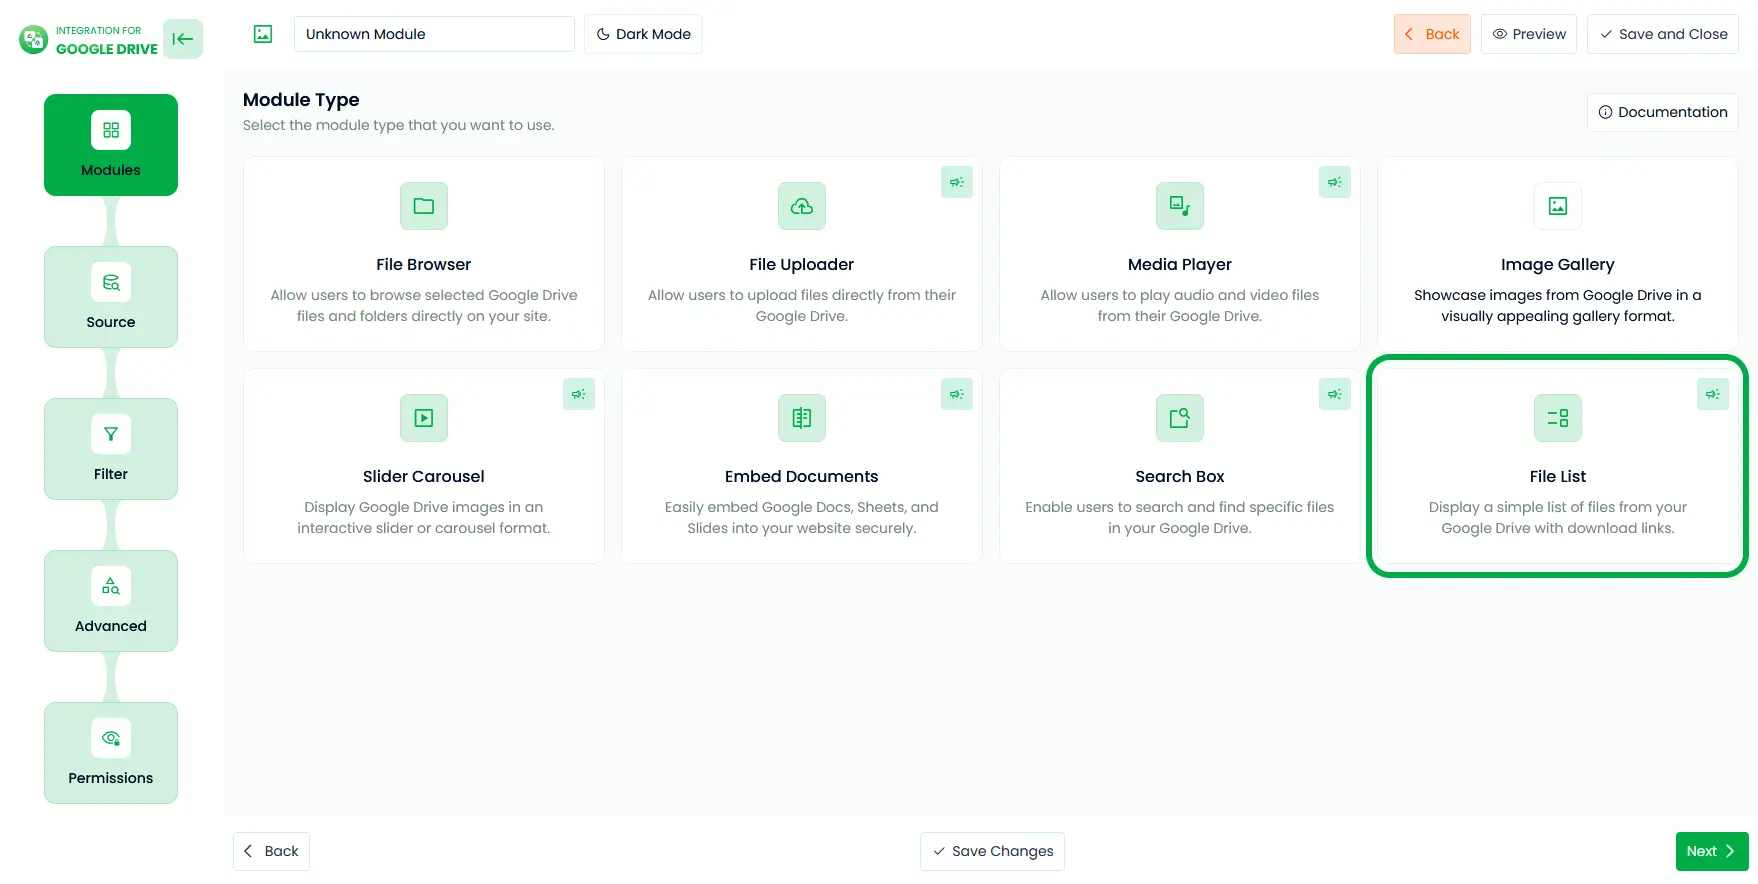
- Navigate to Google Drive, and go to Module Builder. Click Add new Module.
- Select List Module
- Rename the module title (not required)
Step 2: Configure Source Tab
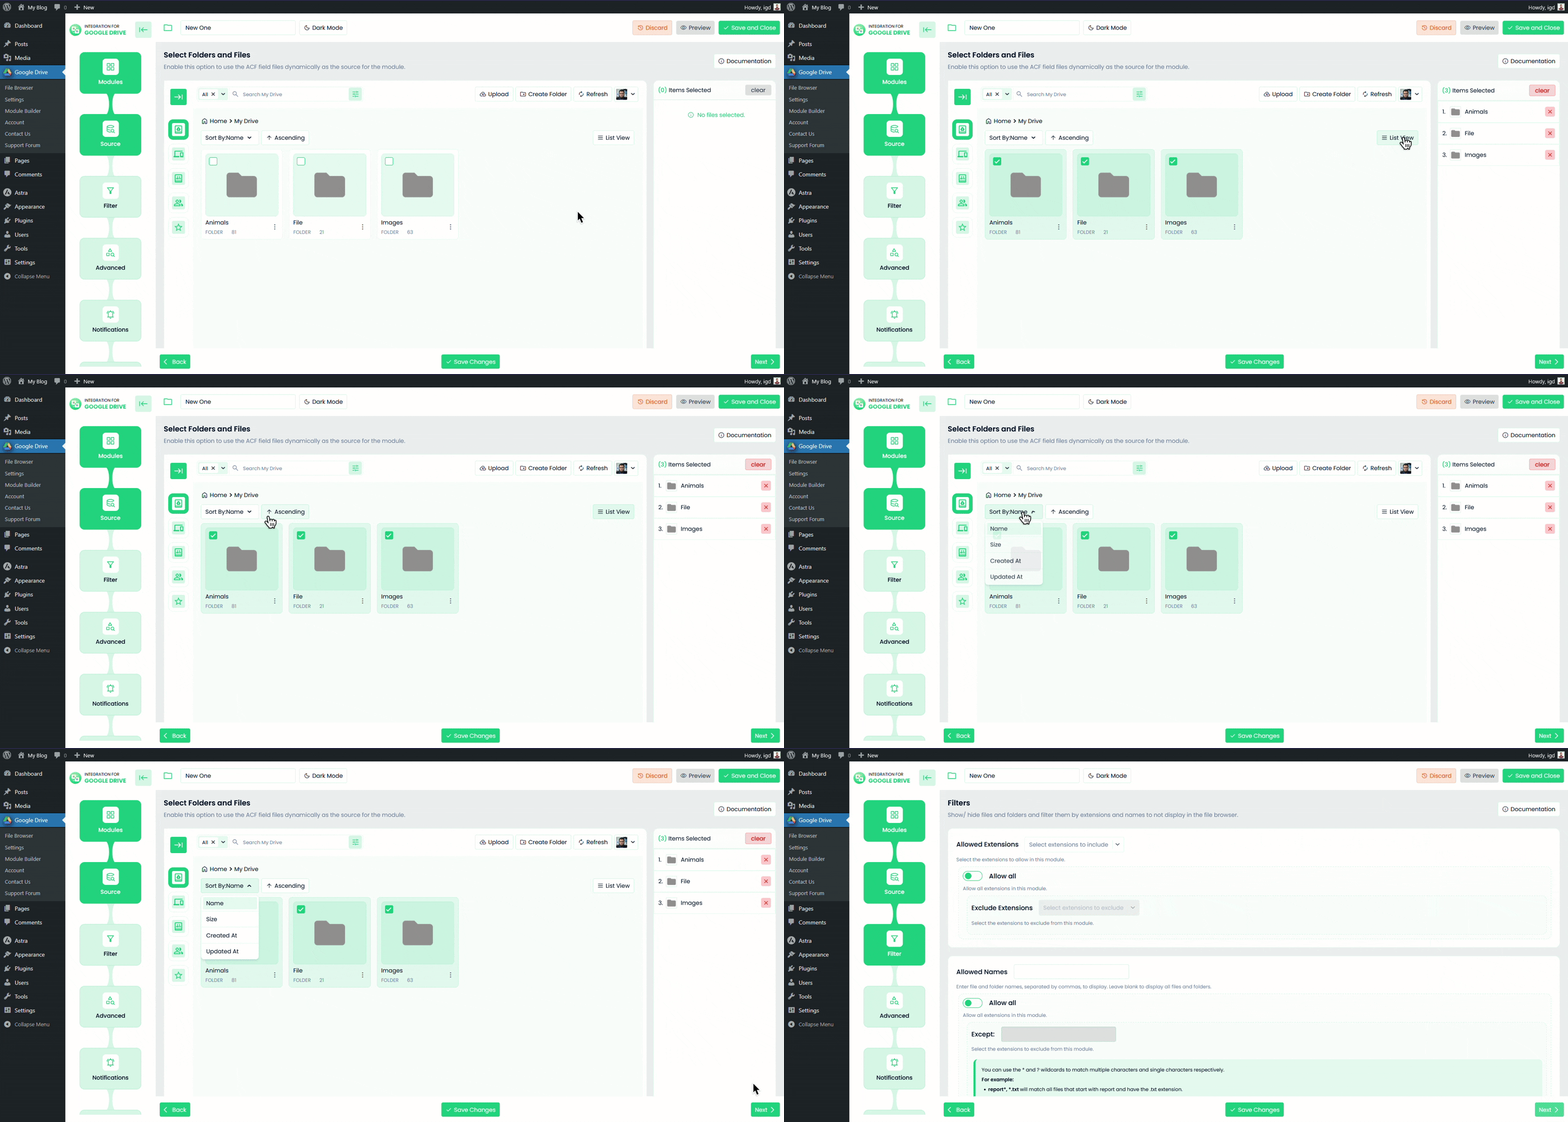
In the Sources tab, select which media files you want to display in the player. You can pick files directly from your connected Google Drive.
- Click the File or use the Select Box to choose your folder or file.
- You can also drag and select folders using your mouse.
Step 3: Configure Filter Tab
Use the filter tab to include or exclude specific files or folders.
- Allowed Extensions: Choose which file types you want to allow (e.g., jpg, png, pdf). Leave empty to allow all types.
- Allowed Names: Enter file or folder names separated by commas to display. Leave blank to show all.
- Apply to: Select the type of files or folder to apply the name filters.
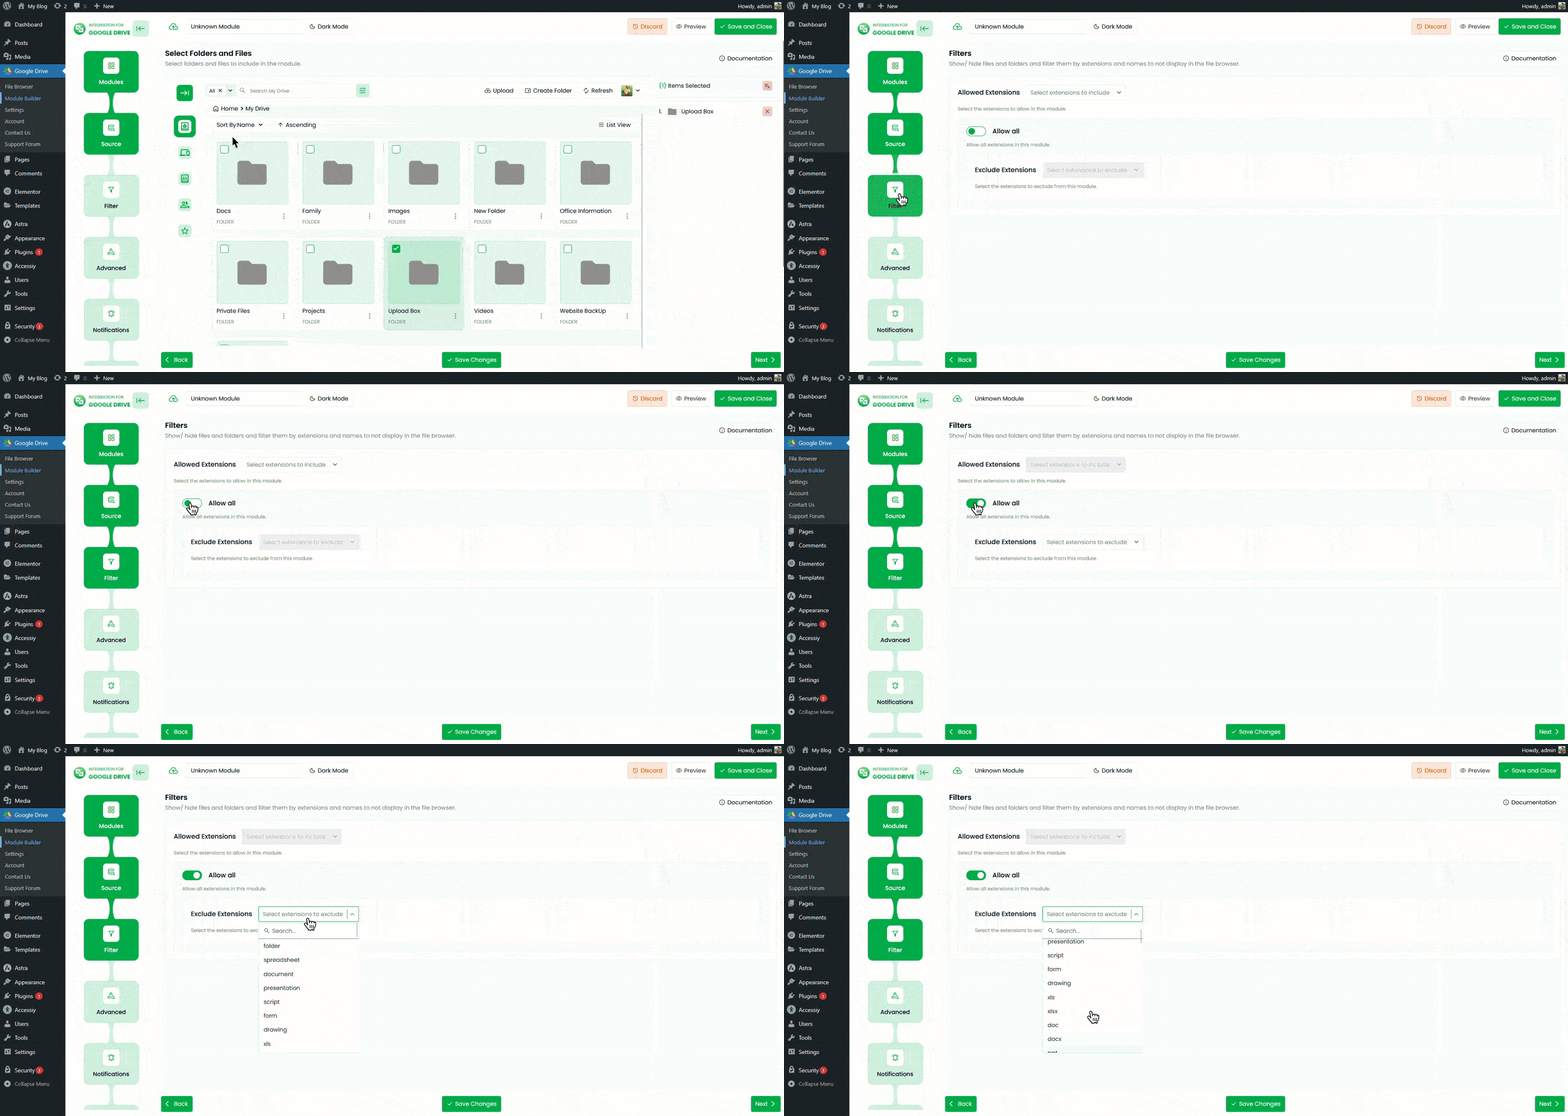
Step 4: Configure the Advanced Tab
Customize the embed settings and document display options.
- Container Width & Height: Set the module width and height by customizing the range (e.g., 360px or 80%). Leave blank for default.
- Module Theme: Choose between dark mode or light mode.
- File Loading Type: Choose a type for how your file will load (Load More, Infinite Scroll, Pagination).
- Files in First Render: How many files to display initially?
- View Button Customization: Customize the view button.
- Button Text: You can set any name to this view button.
- Button Background Color: You can also change the background color of the button.
- Button Text Color: Change the color of the button text.
- Border Radius: Set the border radius of the button to match the brand consistency.
- Button Size: Select a size, how big or small you want it to be, with the options (Large, Medium, Small).
- Open in new tab: Toggle it on to open all links in a new tab.
- Download Button: Enable and customize the download button.
- Button Text: You can set any name to this button.
- Button Background Color: You can also change the background color of the button.
- Button Text Color: Change the color of the button text.
- Border Radius: Set the border radius of the button to match the brand consistency.
- Button Size: Select a size, how big or small you want it to be, with the options (Large, Medium, Small).
- Display: For better responsiveness, select each option and customize the Number of columns for the desktop, tablet, and mobile device.
- Show File Size: Toggle it on to show file size.
- Show Time Stamp: Toggle it on to show the file time stamp.
- Enable Auto File Fetching: When you enable this option, all your newly uploaded files will automatically come to the module.
- Sorting: Sort files by Name, Size, Created Date, Updated Date, Ascending or Descending order.
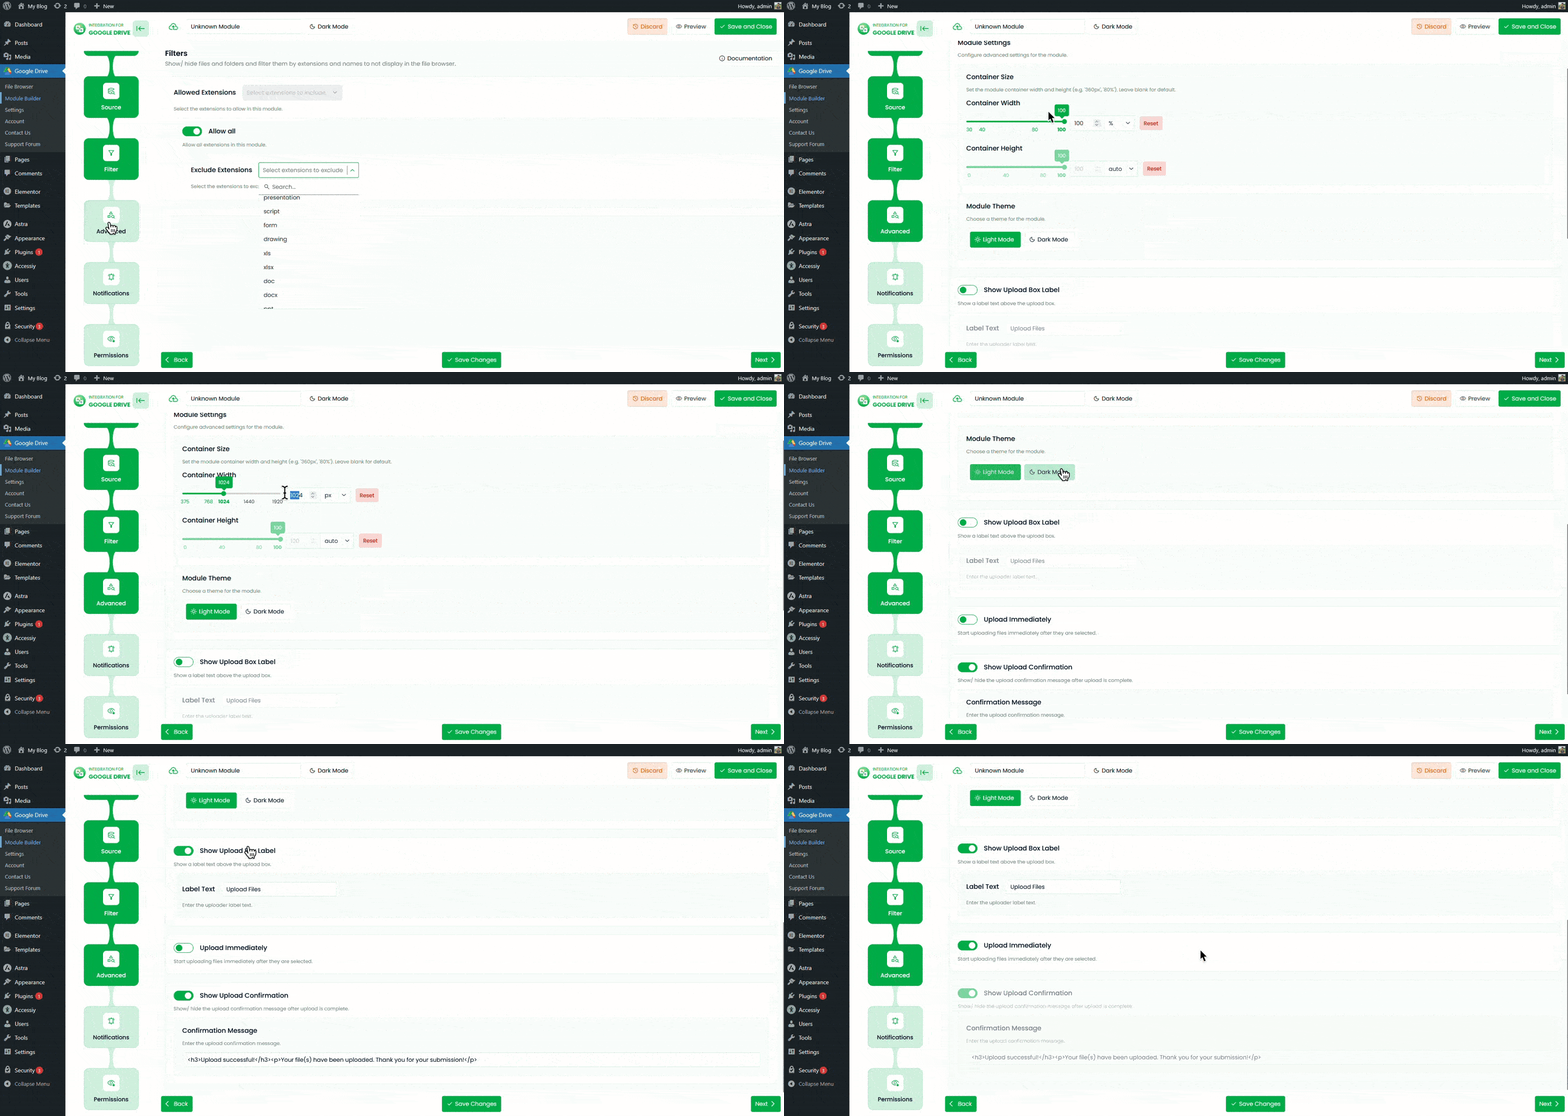
Step 5: Configure Notifications Tab
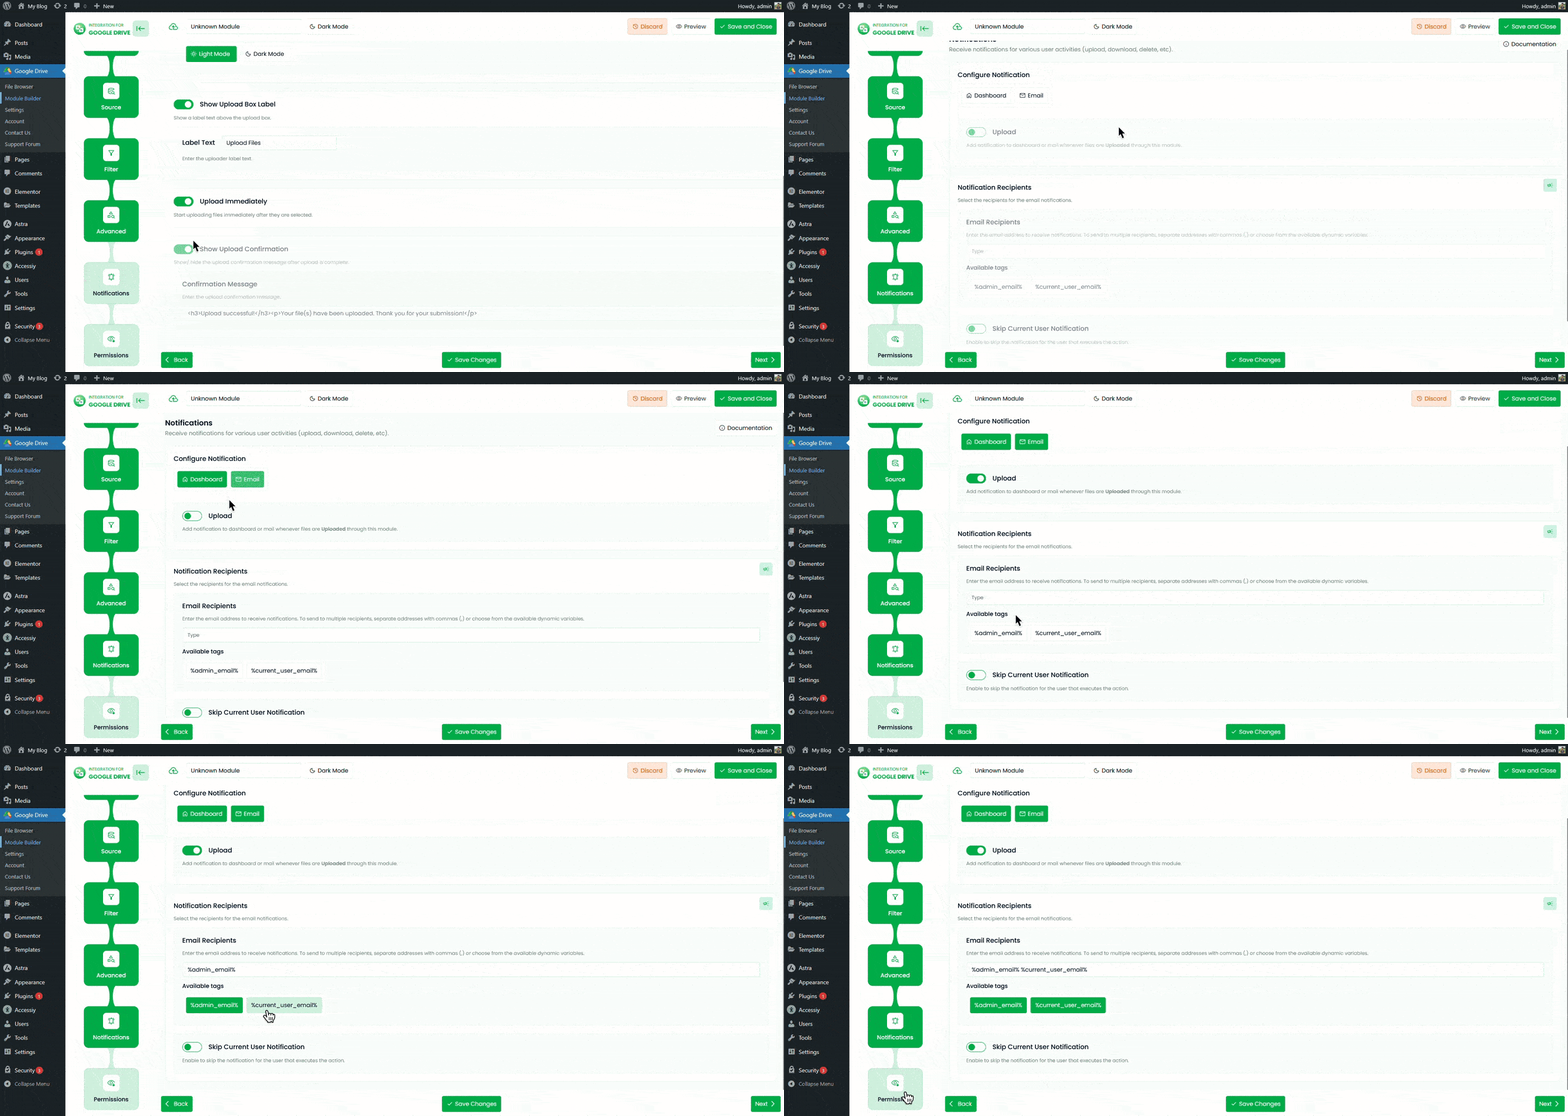
Set up notifications to stay informed about user actions.
- Configure Notifications: Turn on to receive notifications via Dashboard or Email (or both).
- Download Notification: Receive emails whenever files are downloaded.
- Notification Recipients: Enter one or more email addresses separated by commas (e.g.,
%admin_email%, %user_email%). - Skip Current User Notification: Disable notifications for the user performing the search.
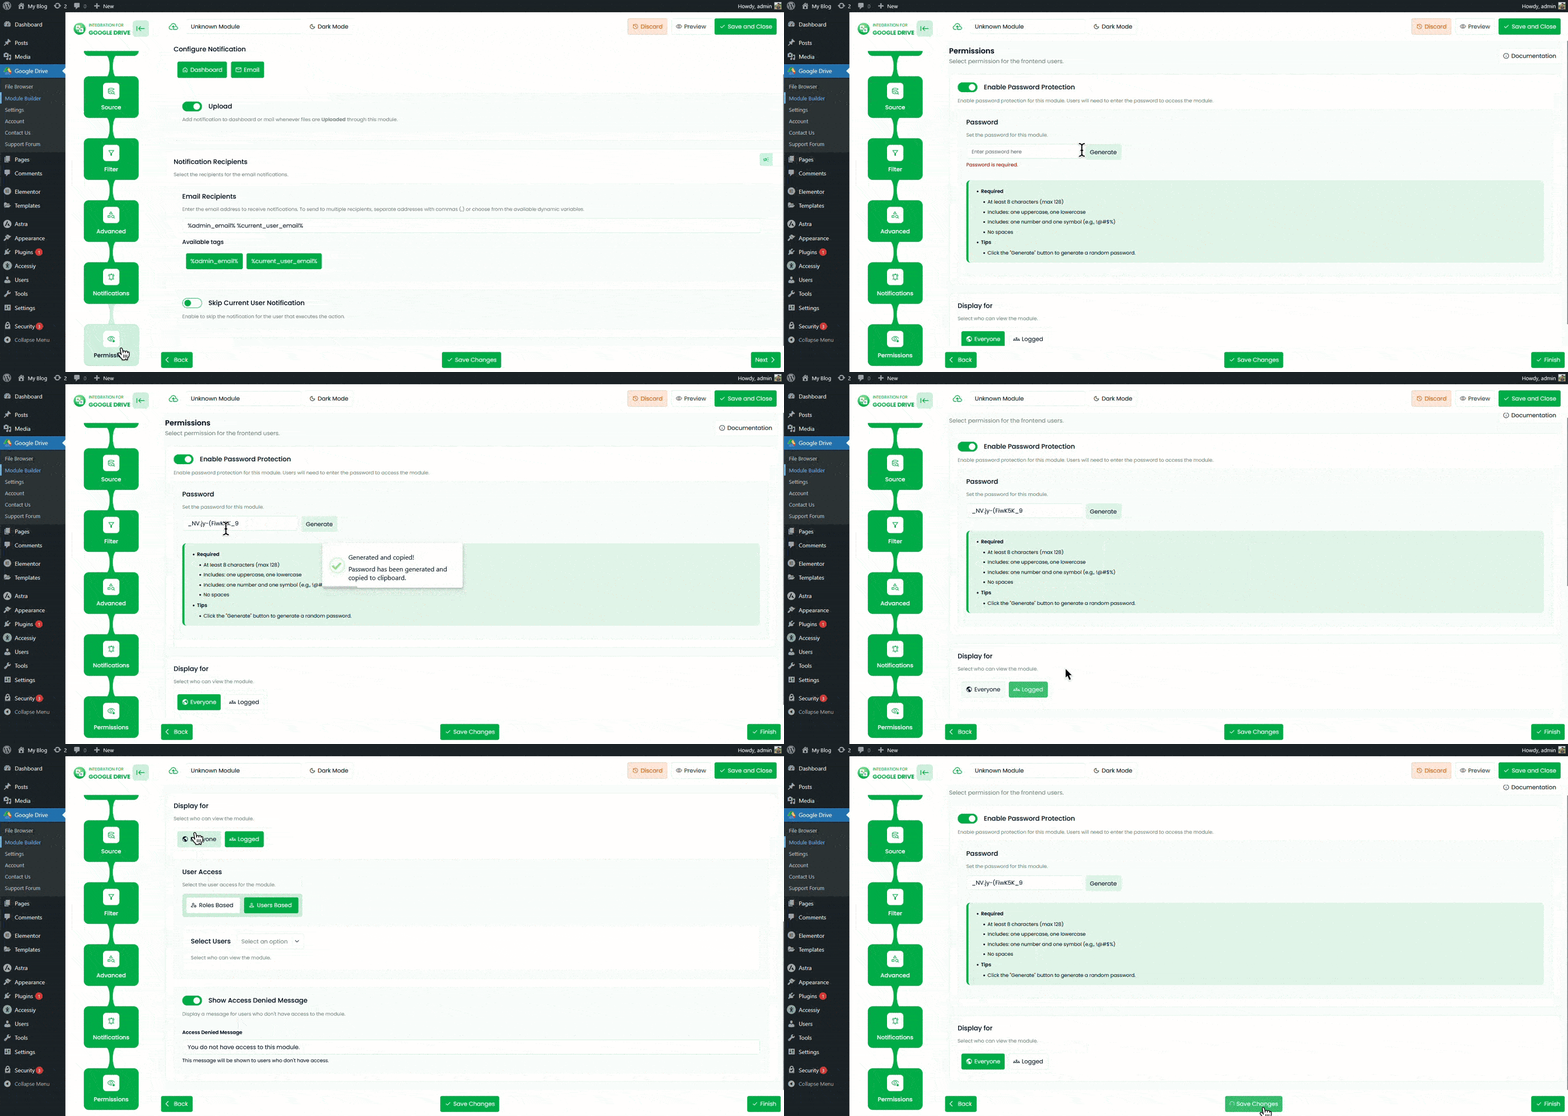
Step 6: Configure Permissions Tab
Set access control and permissions for your List View module.
- Download: Allow users to download files.
- Filter Users & Roles: Select users & roles who can preview files.
- Enable Password Protection: Require users to enter a password before accessing the module.
- Password: Set the password for this module.
- Display For: Choose who can see the module.
- Everyone: The module will be visible to all users.
- Logged: Restrict the module to logged-in users.
- User Access: When Logged is selected, you’ll see two more options:
- Role-Based Access: Select which user roles can access the module.
- User-Based Access: Select specific users who can access the module.
- Show Denied Message: Display a message for users who don’t have permission to access the search box.
After completing all steps, click Save Changes and copy the shortcode. Paste the shortcode into any post or page to display your List Module with Google Drive files.
Output
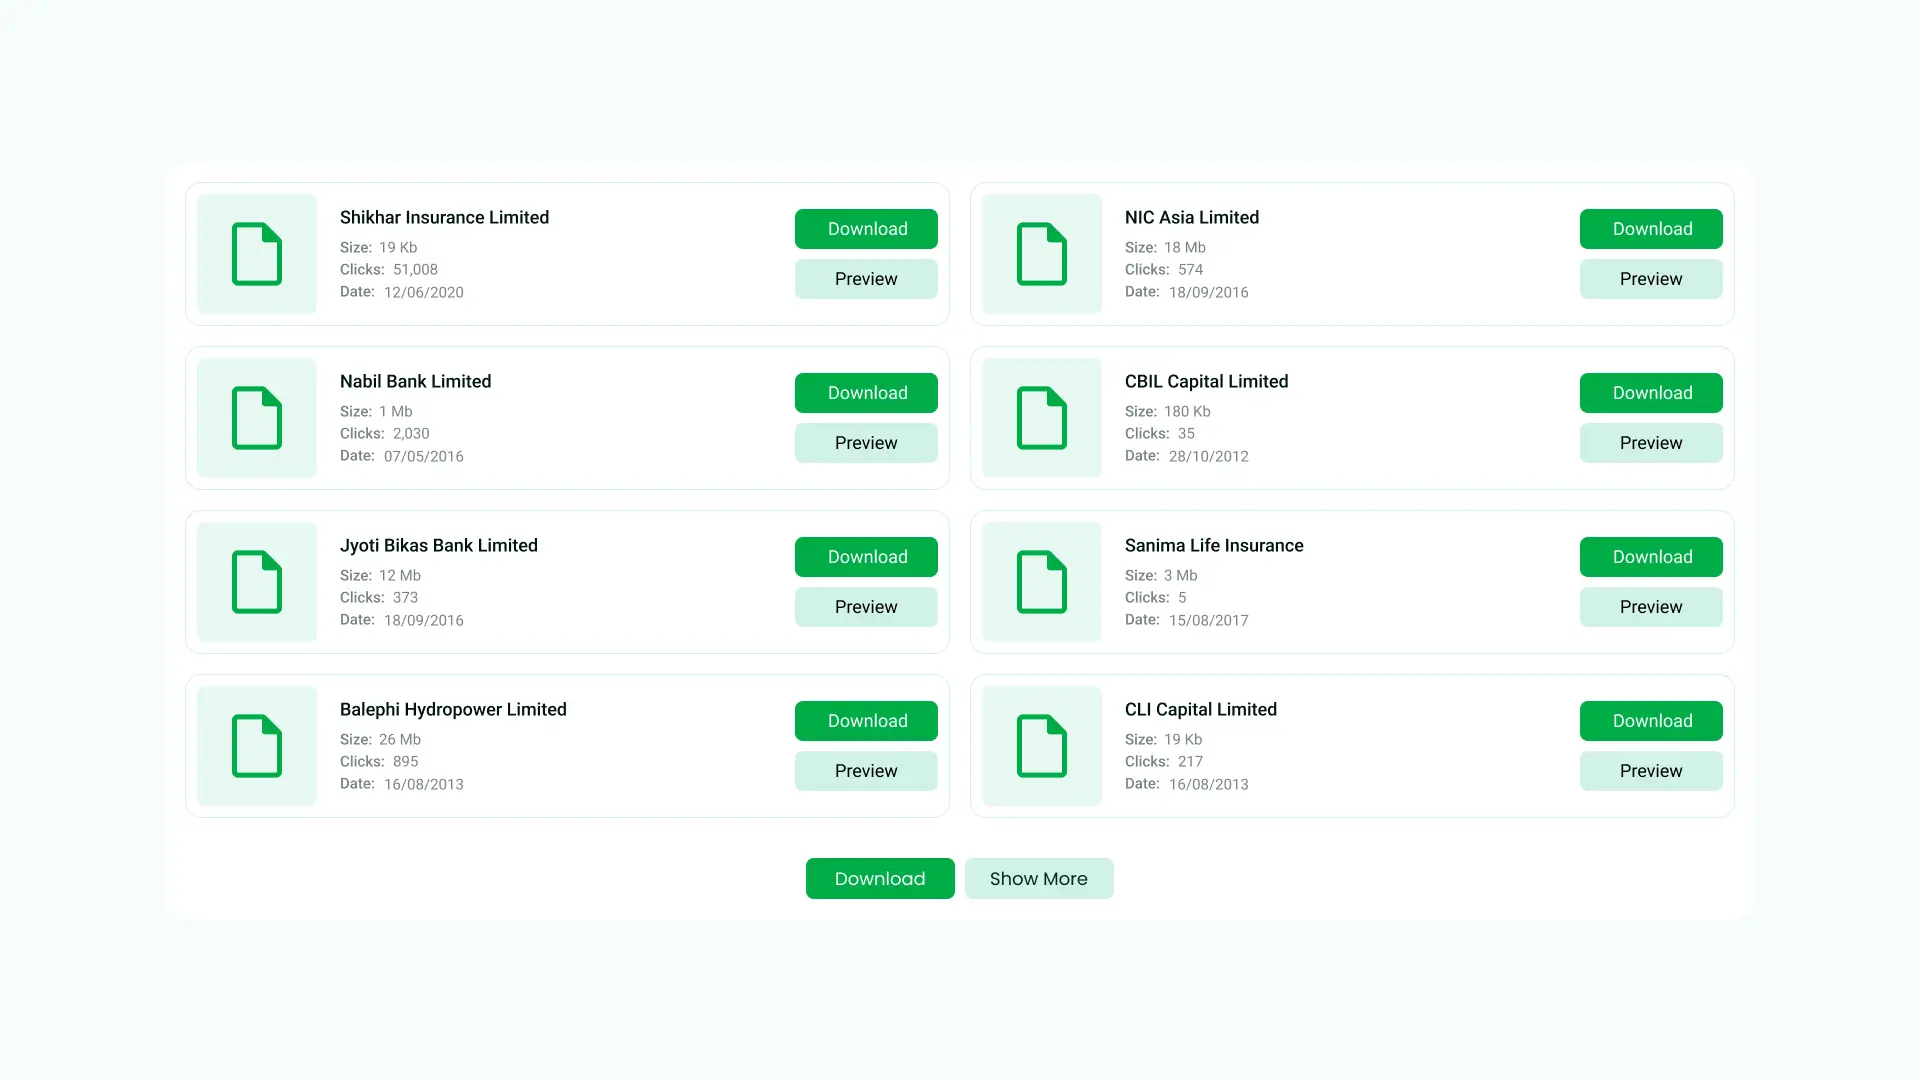
The List Module will now display your selected Google Drive files in a clean, structured list format with preview, download, and edit options as configured.