How to Enable Auto Synchronization?
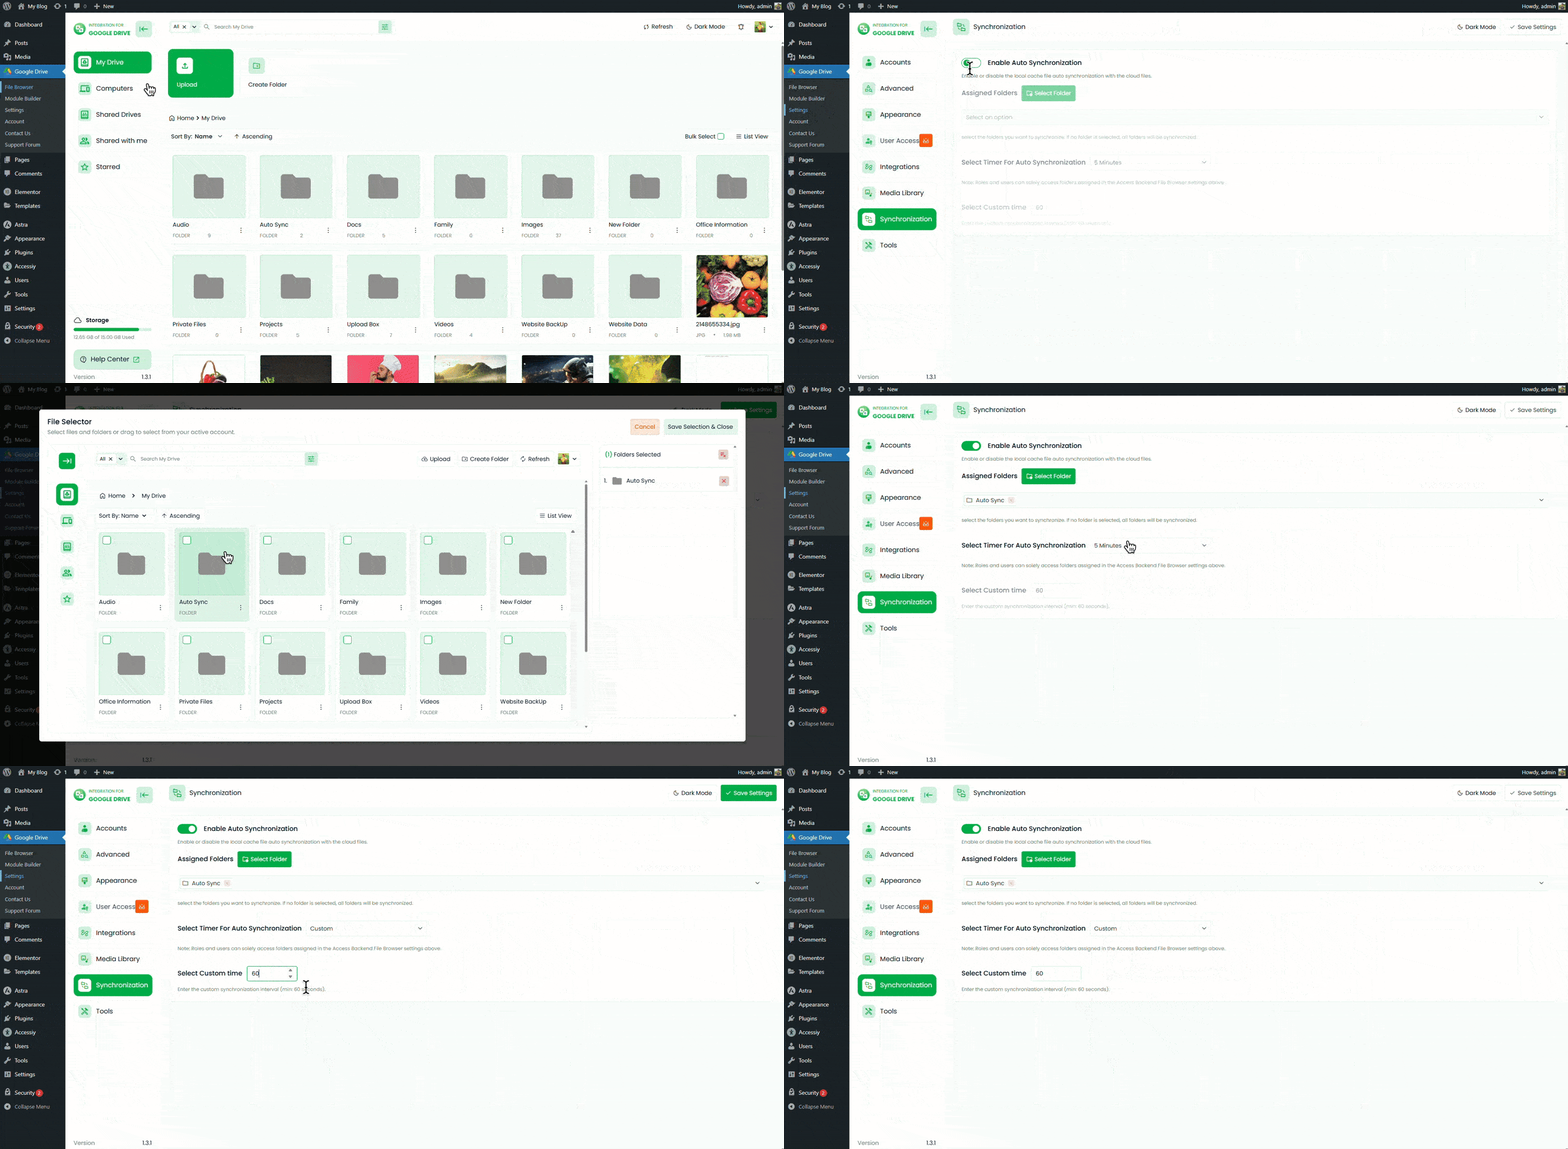
The Integration for Google Drive plugin allows your files to stay up-to-date automatically without the need for manual syncing. Once enabled, the plugin will fetch updates to your modules automatically, syncing every 60 seconds. Here’s how to enable this feature.
Step 1: Enable Auto Synchronization
- Go to Settings.
- Click on Synchronization.
- Enable Auto Synchronization.
- Assign folders by clicking Select Folder.
- Set the synchronization timer and choose Custom.
- Enter your desired custom interval.
- Click Save Changes.

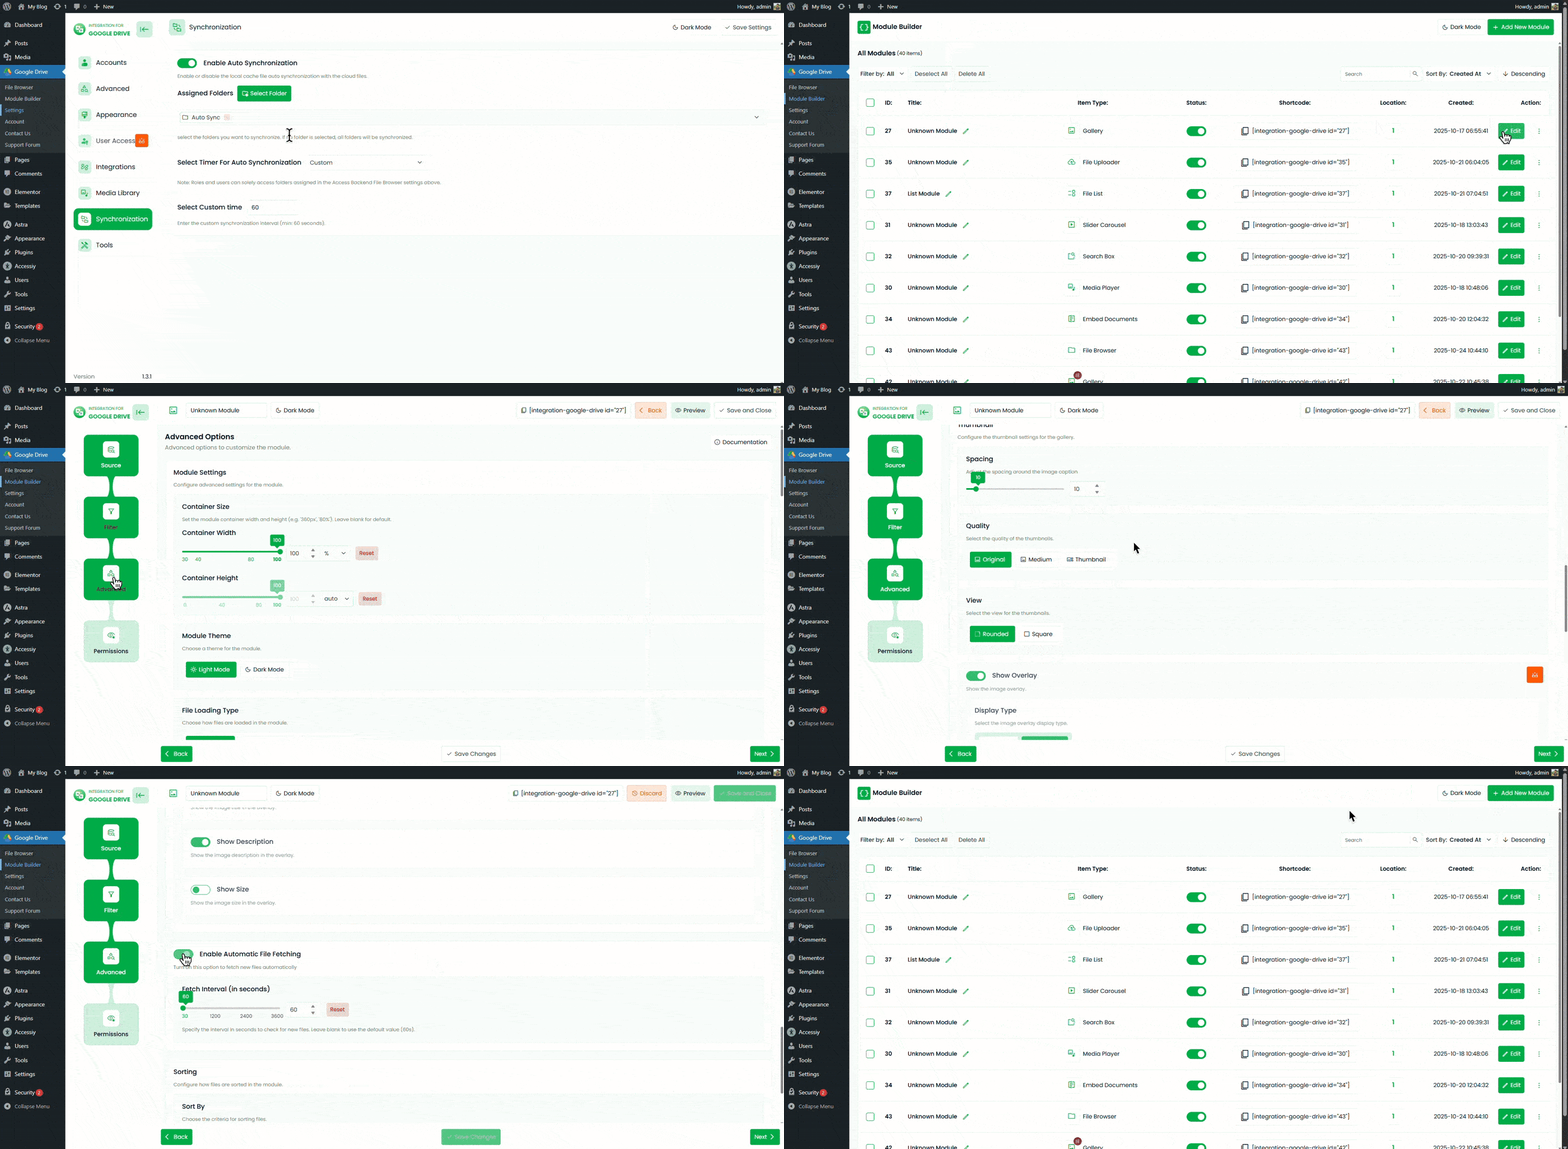
Step 2: Enable WP-Cron
Make sure WP-Cron is enabled on your WordPress site to run scheduled tasks. Learn more about WP-Cron on the official WordPress developer guide: WP-Cron Documentation.
Step 3: Enable Auto Fetching on Your Module
- Navigate to your module’s Advanced tab.
- Toggle on the Enable Automatic File Fetching option.
- Select the fetch interval for how often your module should retrieve updates.

Note: Make sure that the file or folder you’ve chosen for auto sync in the module is also selected under your Auto Synchronization settings.

