How to Use WordPress Accessibility Plugin?
Accessibility is crucial for making your website inclusive for all users, including those with disabilities. The Accessiy plugin by CodeConfig simplifies this with a user-friendly toolbar. Follow these steps to install and configure Accessiy on your WordPress site.
Step 1: Install and Activate Accessiy
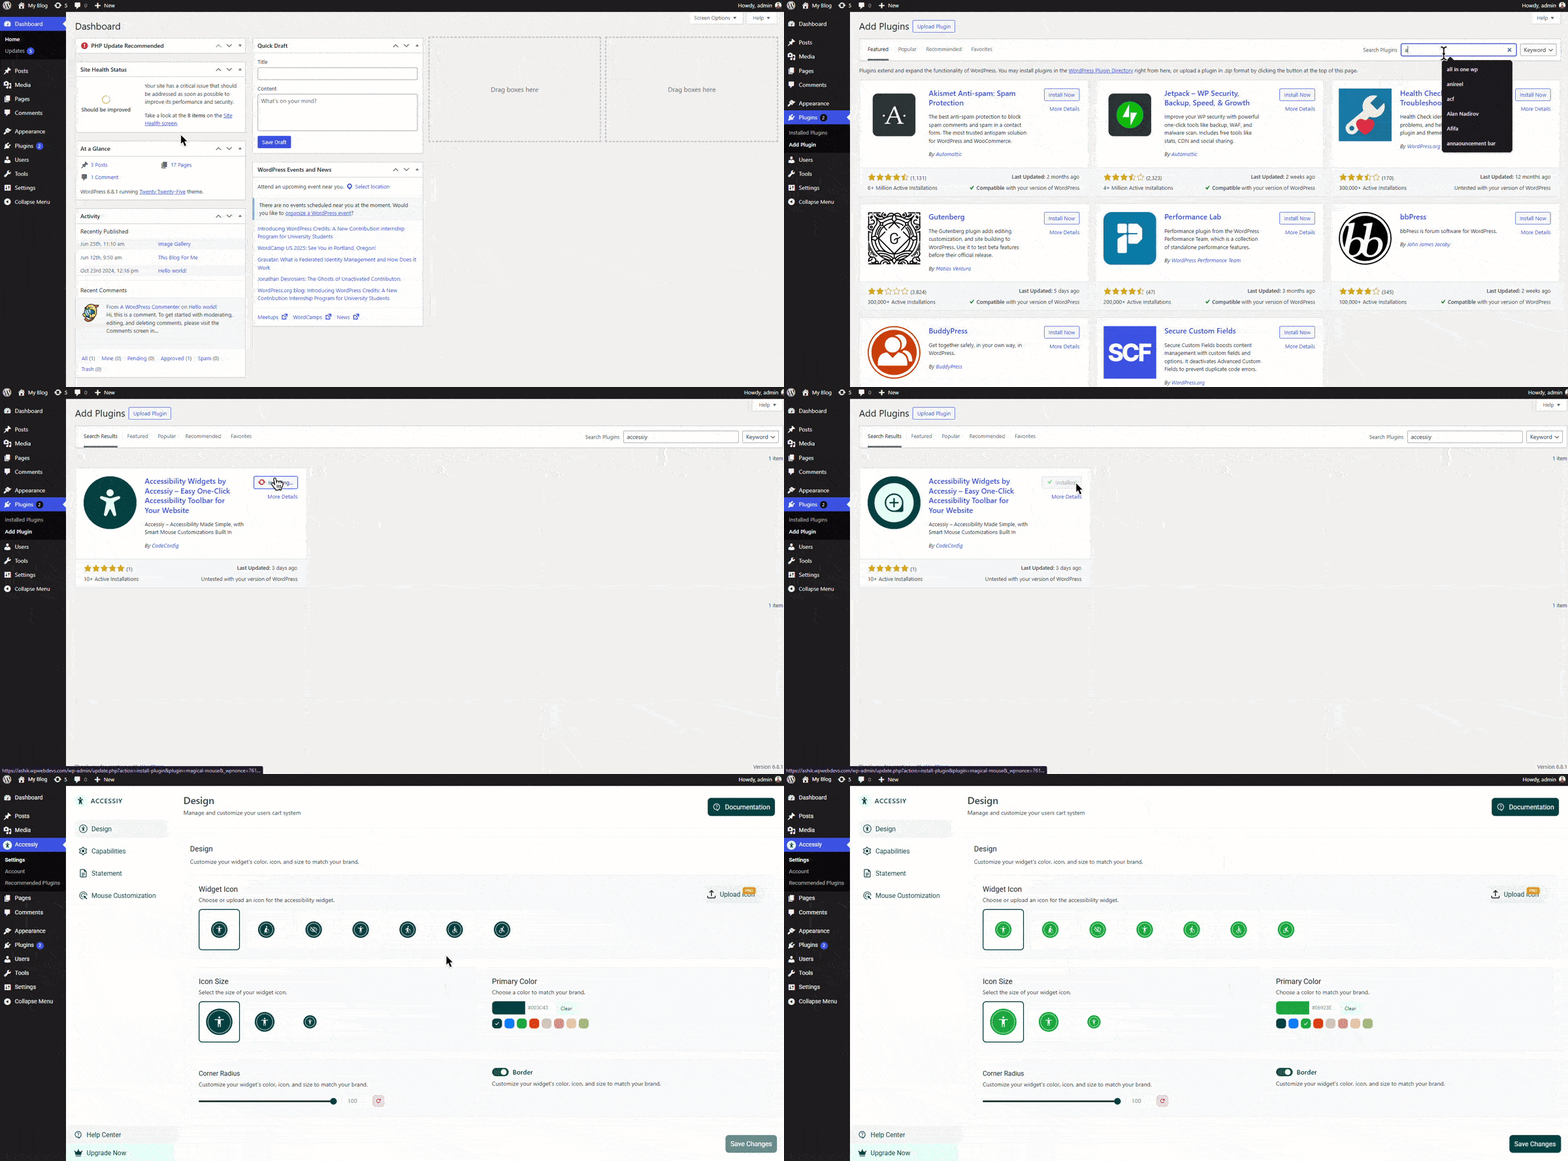
- Log in to your WordPress admin dashboard.
- Go to Plugins > Add New Plugin.
- Search for Accessiy.
- Click Install Now next to the Accessibility Widgets by Accessiy plugin.
- Click Activate to enable the plugin.
Step 2: Configure Accessiy Settings
Once activated, configure the plugin to suit your site’s design and accessibility needs:
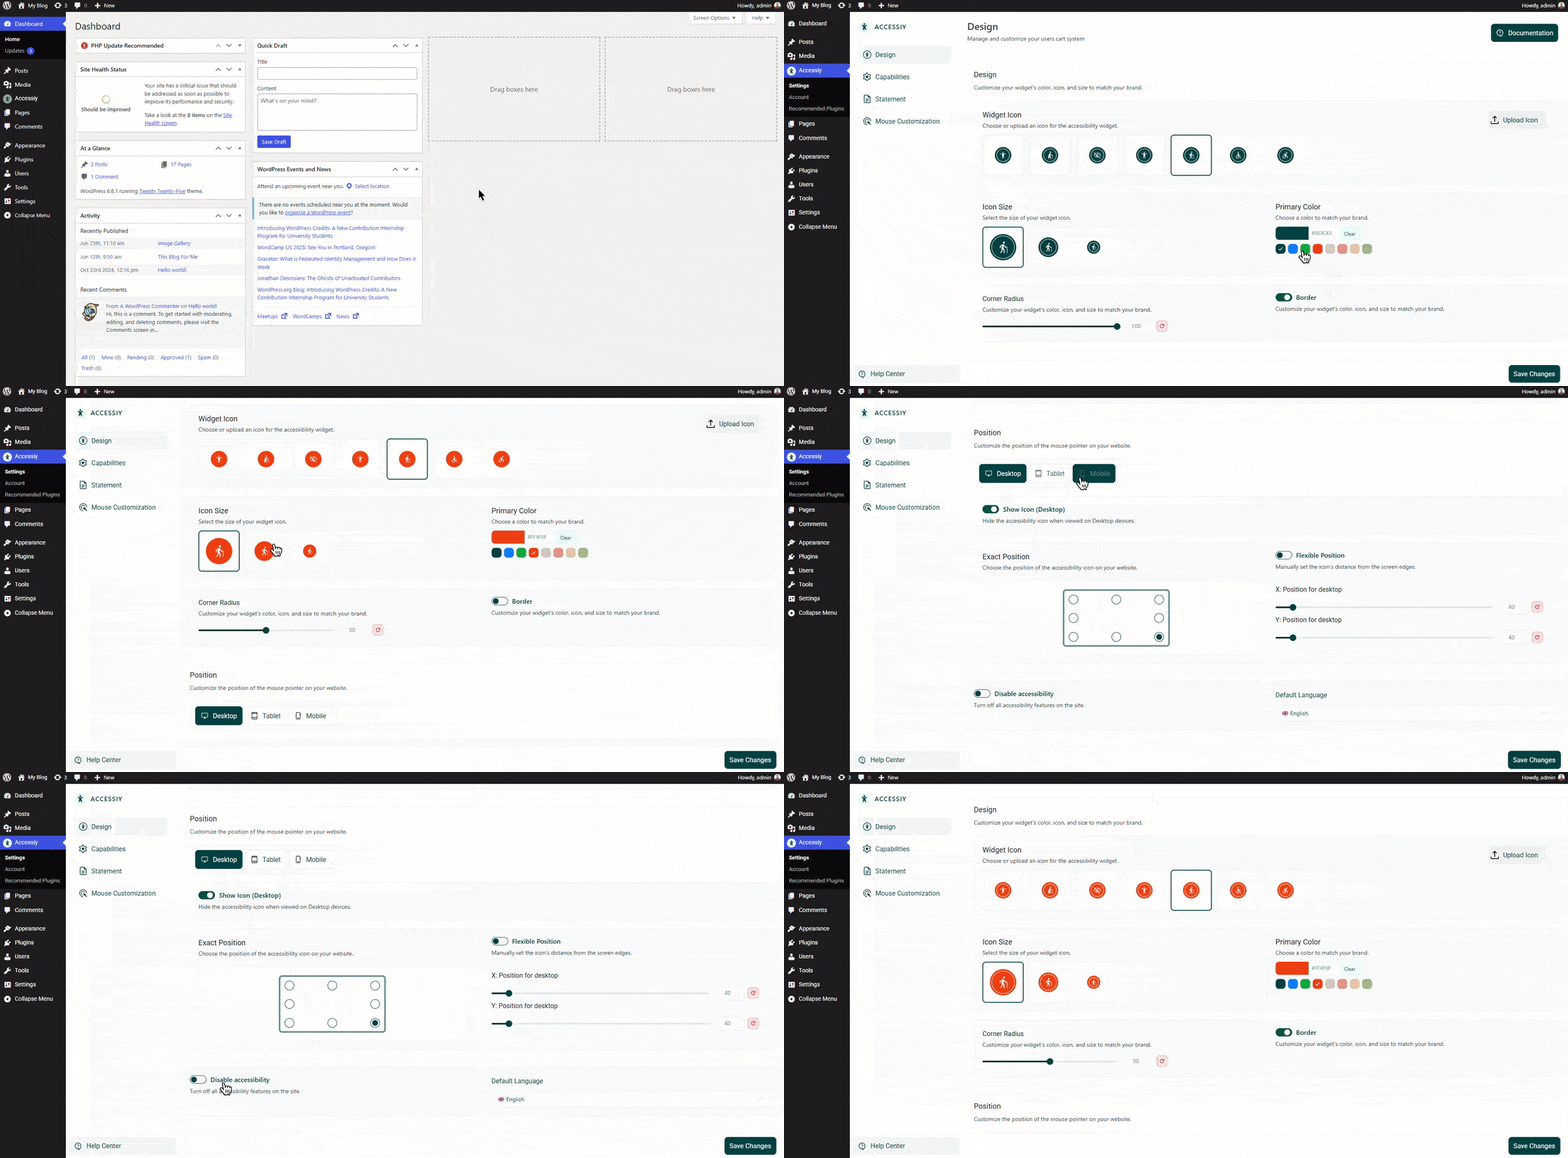
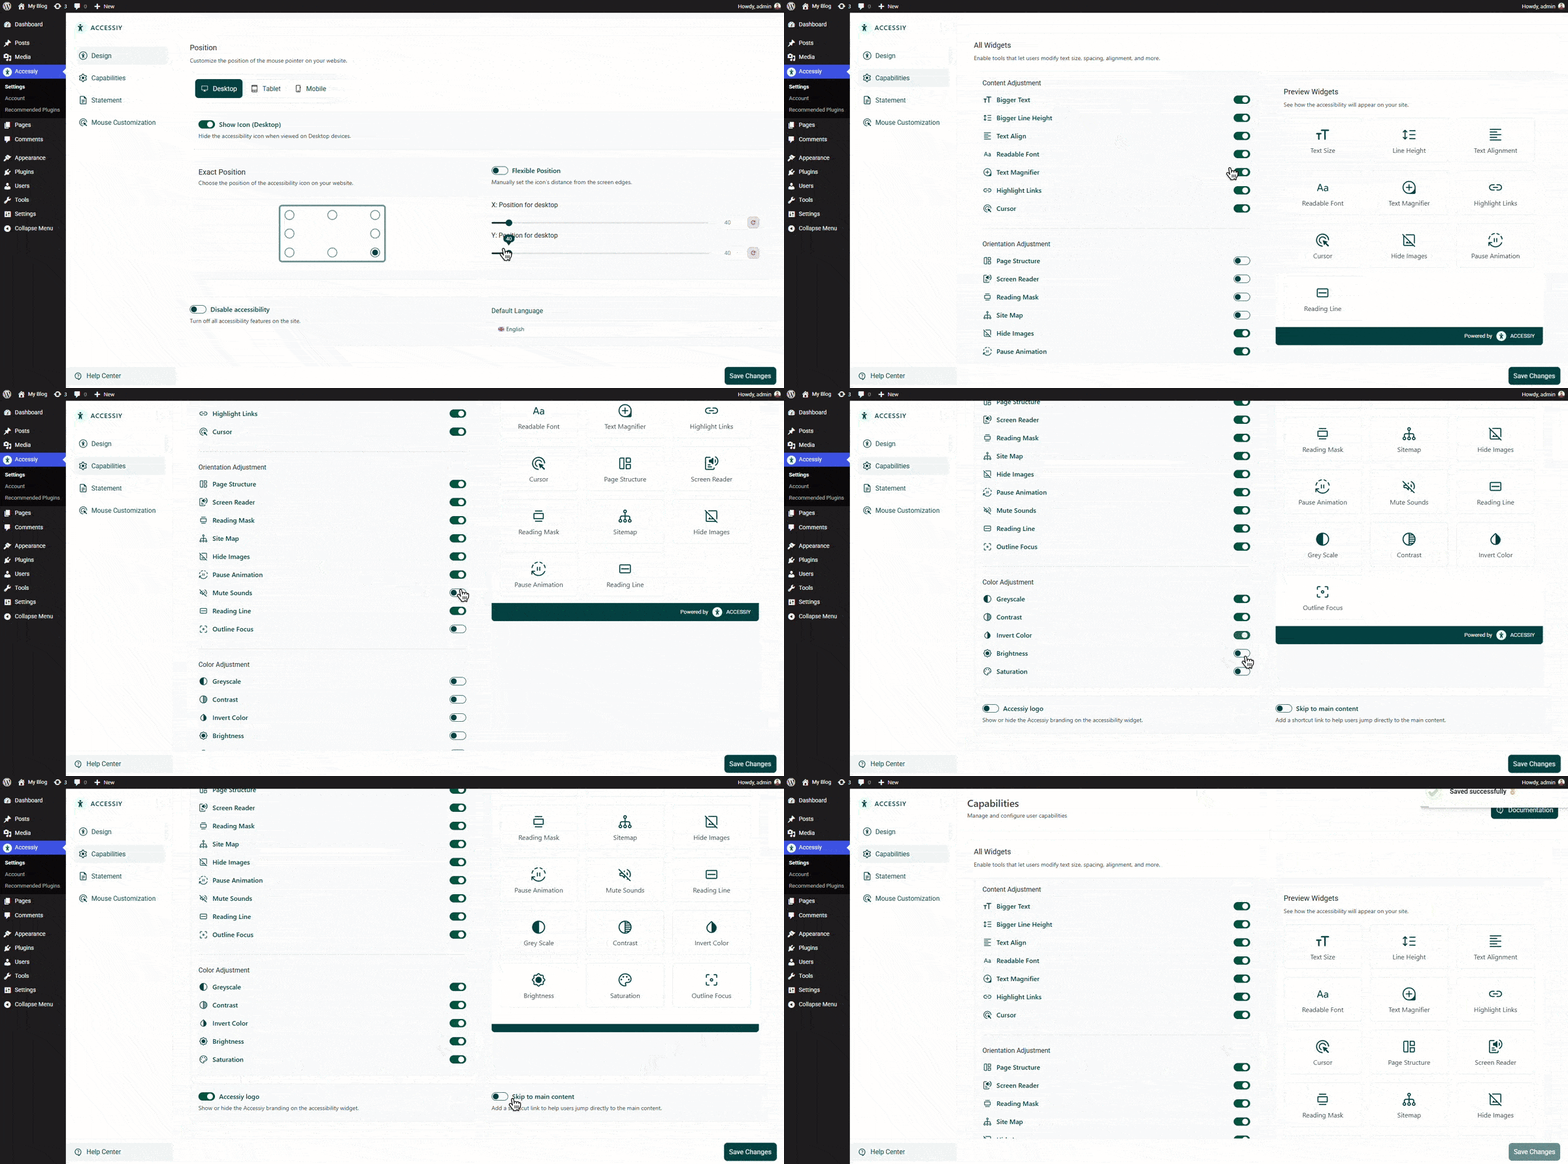
- Navigate to Accessiy > Settings in the WordPress dashboard.
- Design Tab:
- Choose from various icons and three sizes.
- Customize the color, corner radius, and border options for the toolbar.
- Position Settings:
- Adjust the toolbar’s position (e.g., flexible or exact placement).
- Enable or disable the icon for specific devices (desktop, tablet, mobile).
- Language Selection:
- Select from 35+ supported languages to make the toolbar accessible to a global audience.
- Select from 35+ supported languages to make the toolbar accessible to a global audience.
Capabilities Tab:
- Enable or disable individual accessibility widgets (e.g., Bigger Text, Screen Reader, Contrast).
- Optionally enable the Skip to Main Content feature for improved navigation.
Step 3: Save and Test
After configuring the settings, save your changes. Test the toolbar on your website to ensure it displays correctly and functions as expected across devices.
Compatibility Note
If using caching plugins like WP Rocket or NitroPack, clear the cache after configuring Accessiy. For Elementor users, regenerate CSS files via Elementor > Tools > Regenerate CSS & Data.
Support
For assistance, contact our 24/7 support team at https://codeconfig.dev/contact/. Explore Documentation or Video Tutorials for additional guidance.
