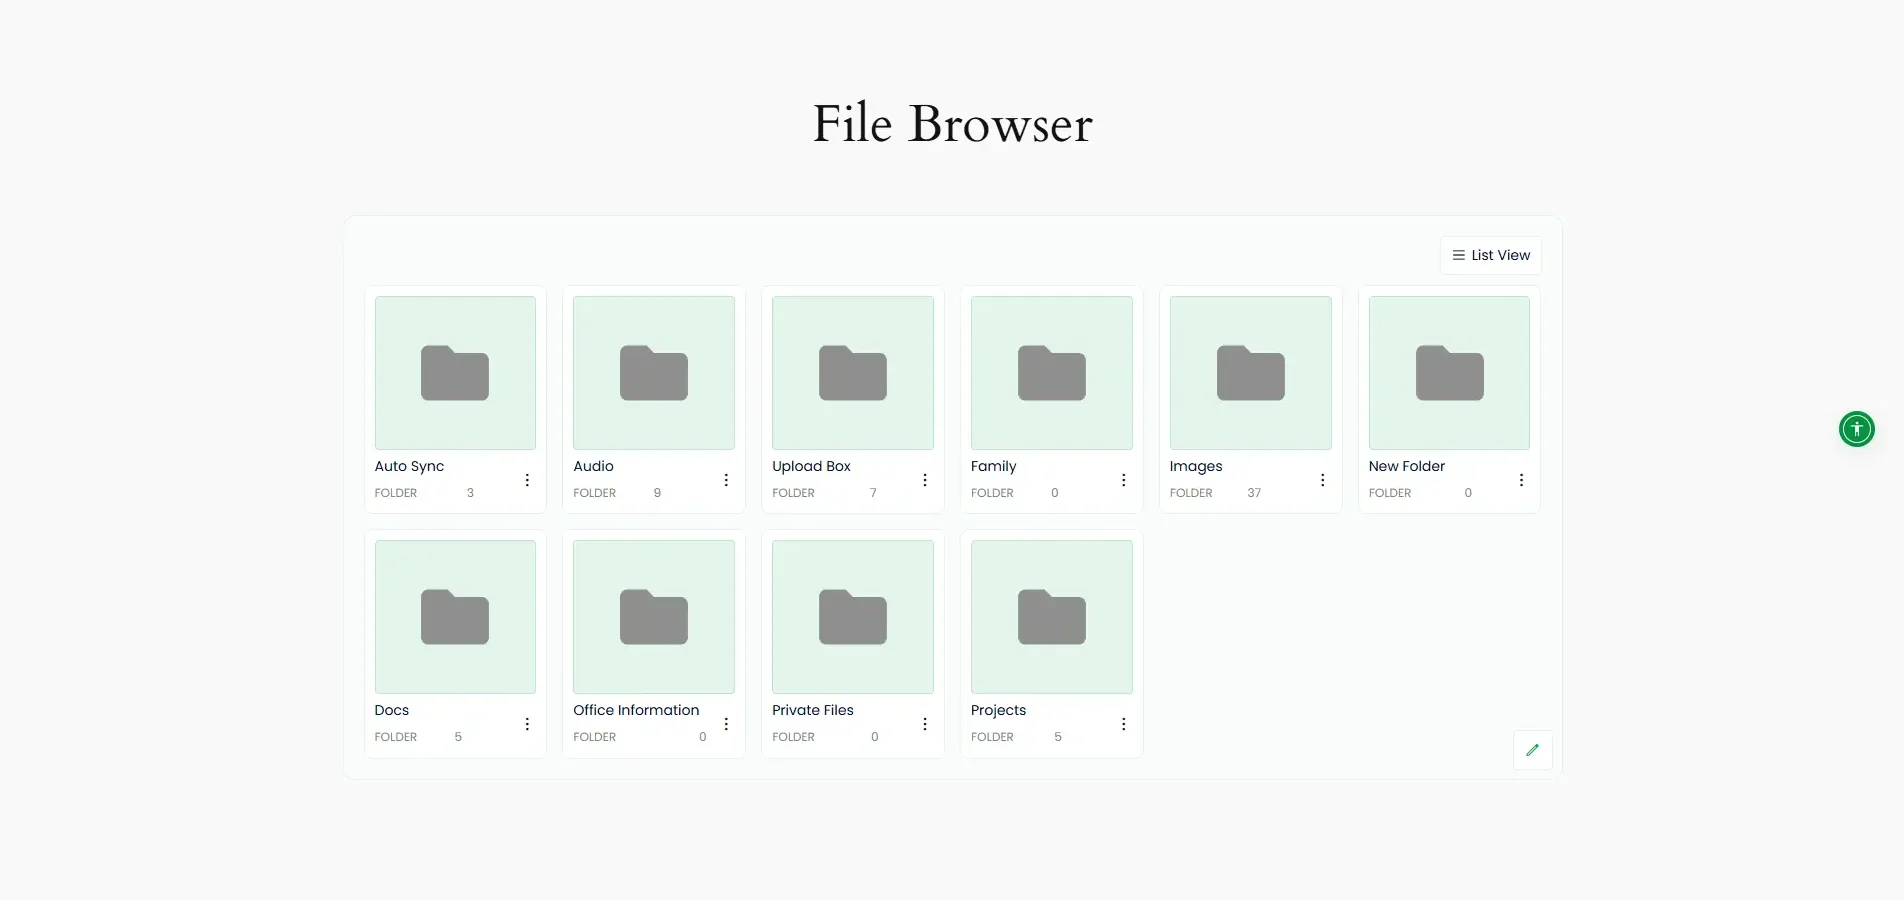
How to Use Integration for Google Drive in Elementor?
Using Google Drive in Elementor can often feel complicated and cluttered. The Integration for Google Drive plugin makes it simple by allowing you to easily access and insert your Google Drive files directly into Elementor. Here’s how it works step-by-step.
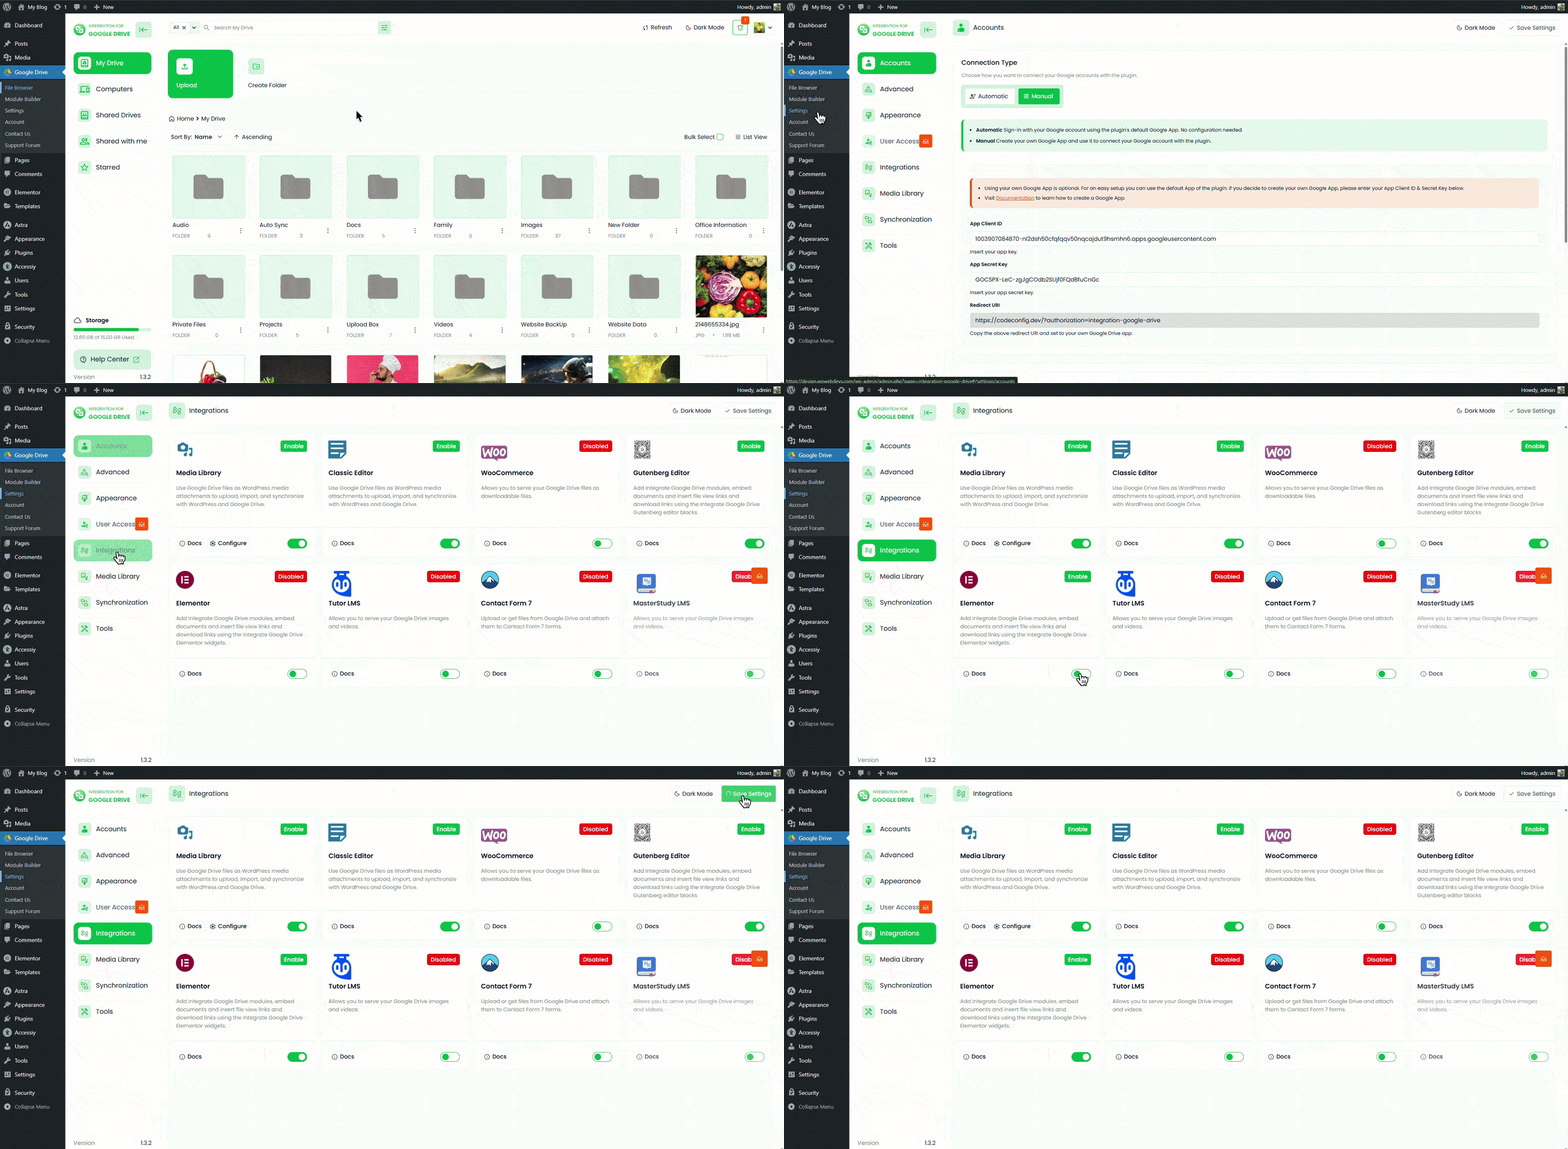
Step 2: Enable Elementor Integration
- Go to the Integration for Google Drive plugin dashboard.
- Click on Settings.
- Select Integrations.
- Enable Elementor Integration.
- Click Save Changes from the top-right corner of the settings page.
Step 3: Edit with Elementor
- Create a new page or post, or open an existing one where you want to display your Google Drive modules.
- Click on Edit with Elementor.
Step 4: Inserting Modules
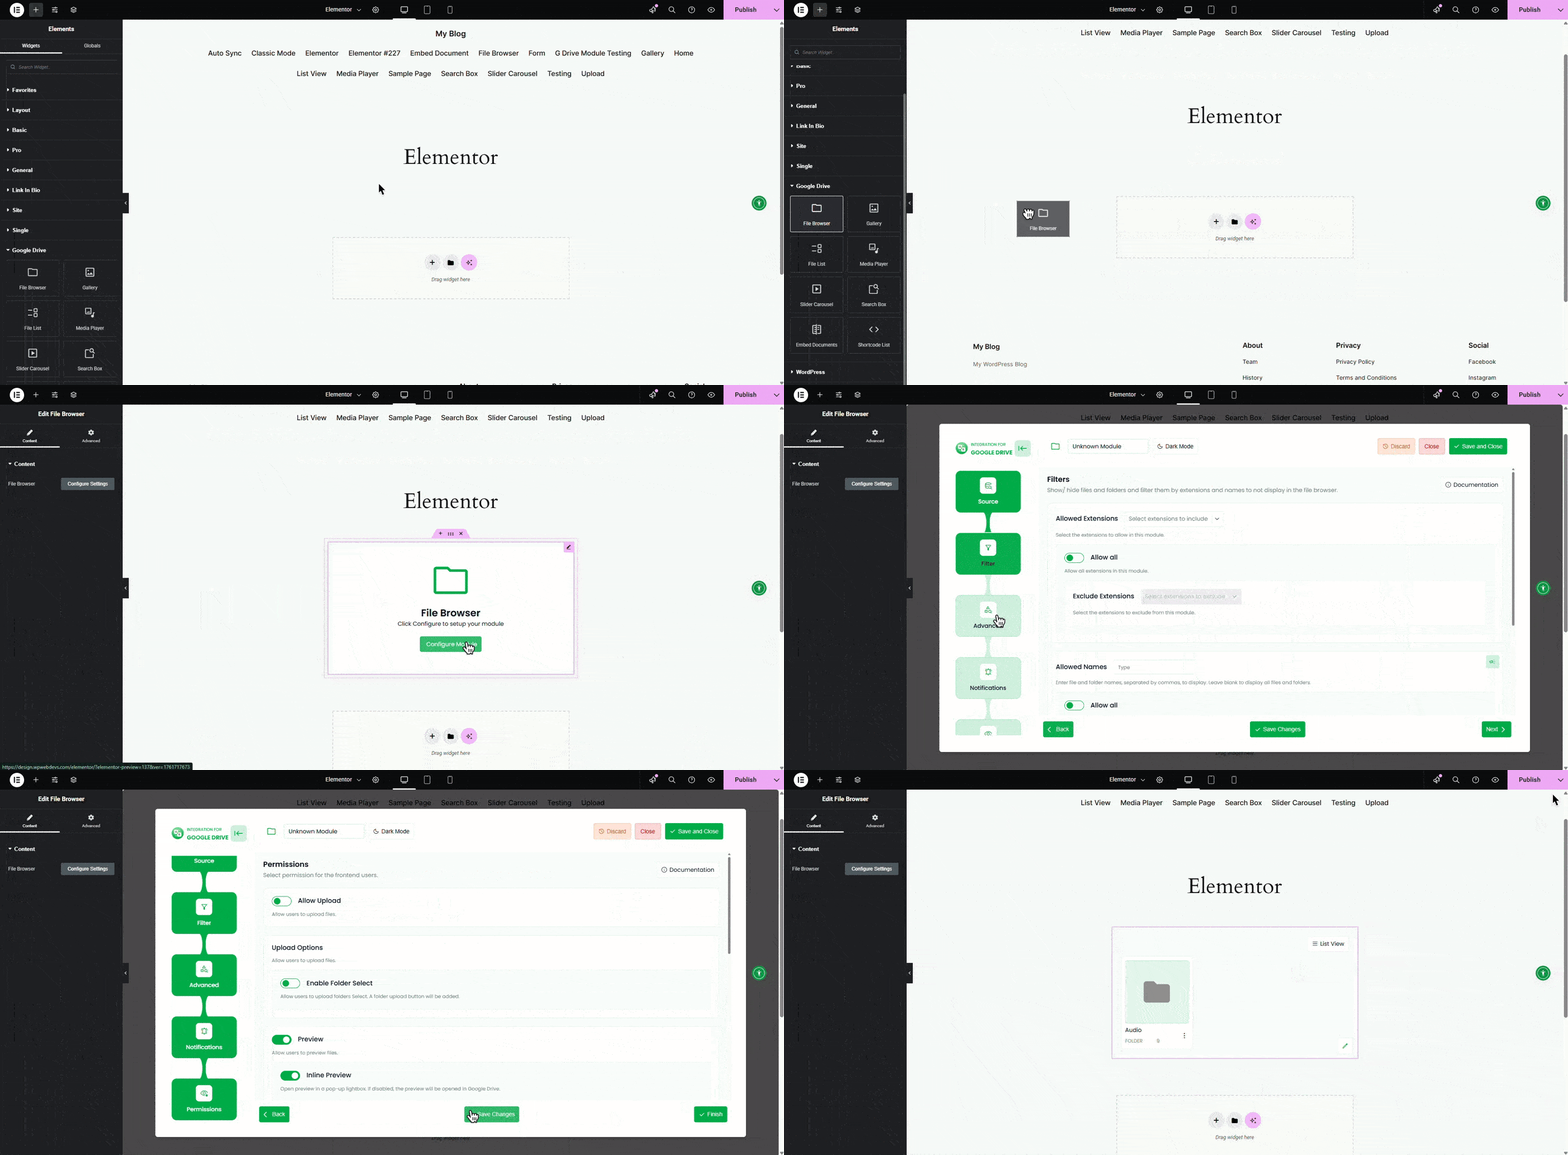
After you’re redirected to the Elementor editor, you can now insert any existing module or create a new one.
- Open the Widgets Inserter panel.
- Scroll down to find the Google Drive Modules section.
- Drag and drop the desired widget into your preferred section.
- Click the Configure Module button to set it up just like you did in the module builder.
Have questions about how to build a module? Read this guide.
Step 5: Inserting Shortcode Module
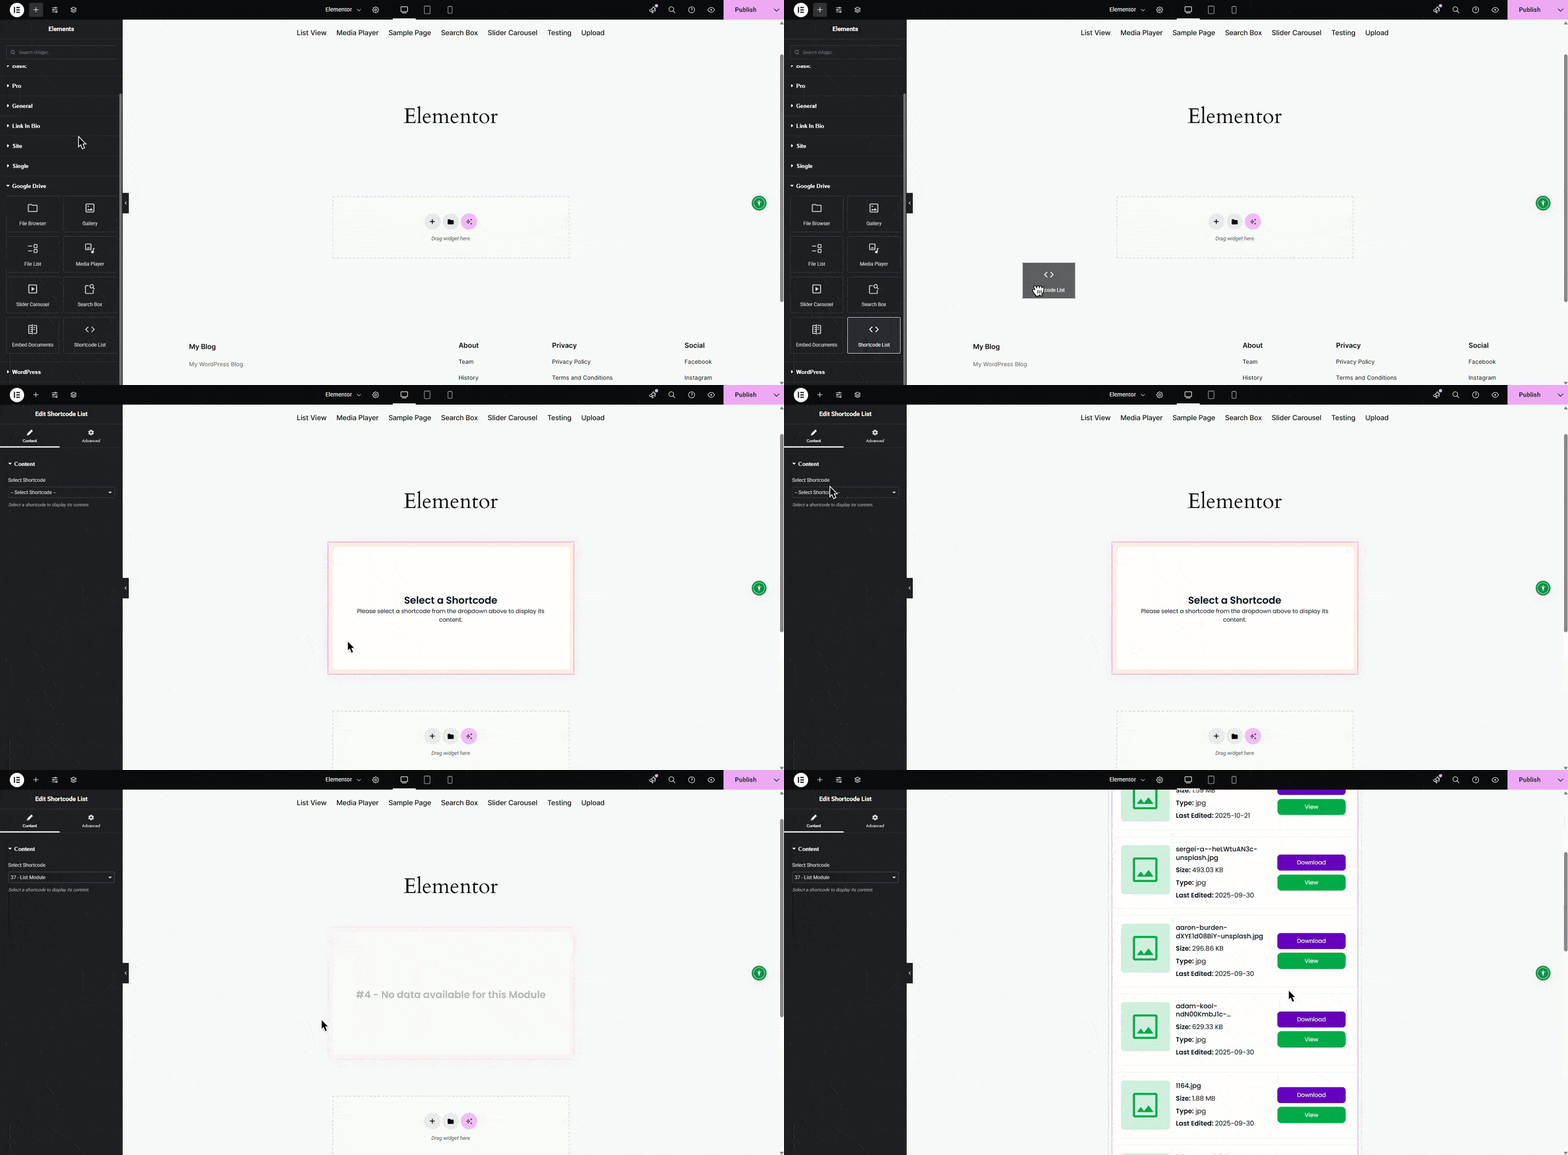
If you’ve already created a module in the Module Builder and want to insert it using a shortcode:
- Drag the Shortcode List widget into your desired section.
- Select the shortcode you want to insert from the dropdown list.
Step 6: Output
For example, if you select the File Browser module, it will appear directly on your Elementor page. You can now preview and interact with it just like any other Elementor widget. 