How to Connect Dropbox Team Folders in WordPress
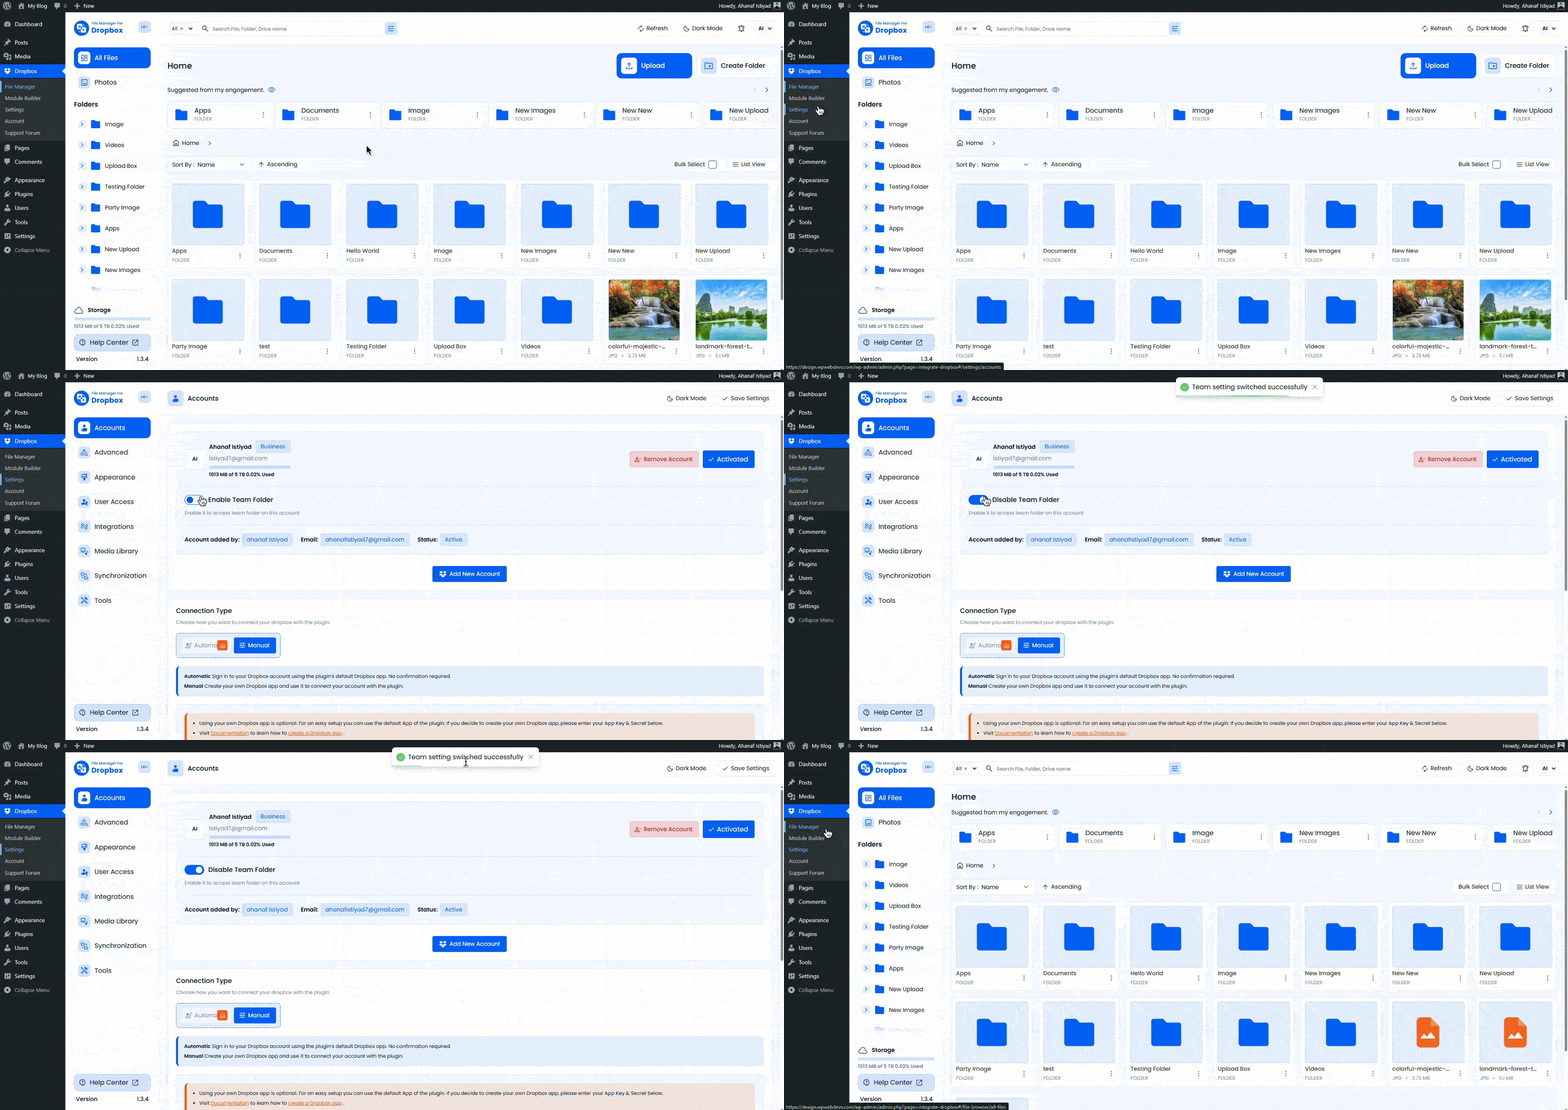
If you’re using the File Manager for Dropbox or the Integrate Dropbox plugin on your WordPress website, and want to access Dropbox Team Folders, this guide walks you through the entire setup process—from enabling the feature in Dropbox settings to syncing and updating your shortcodes.
Step 1: Enable Team Folders in Dropbox
- Log in to your Dropbox Business Admin Console.
- Go to Settings.
- Navigate to the Advanced tab.
- Look for the option to Enable Team Folders and switch it on.
- Save your changes.
Once enabled, Dropbox will allow the creation and management of shared Team Folders within your workspace.
Step 2: Sync Team Folders in File Manager for Dropbox
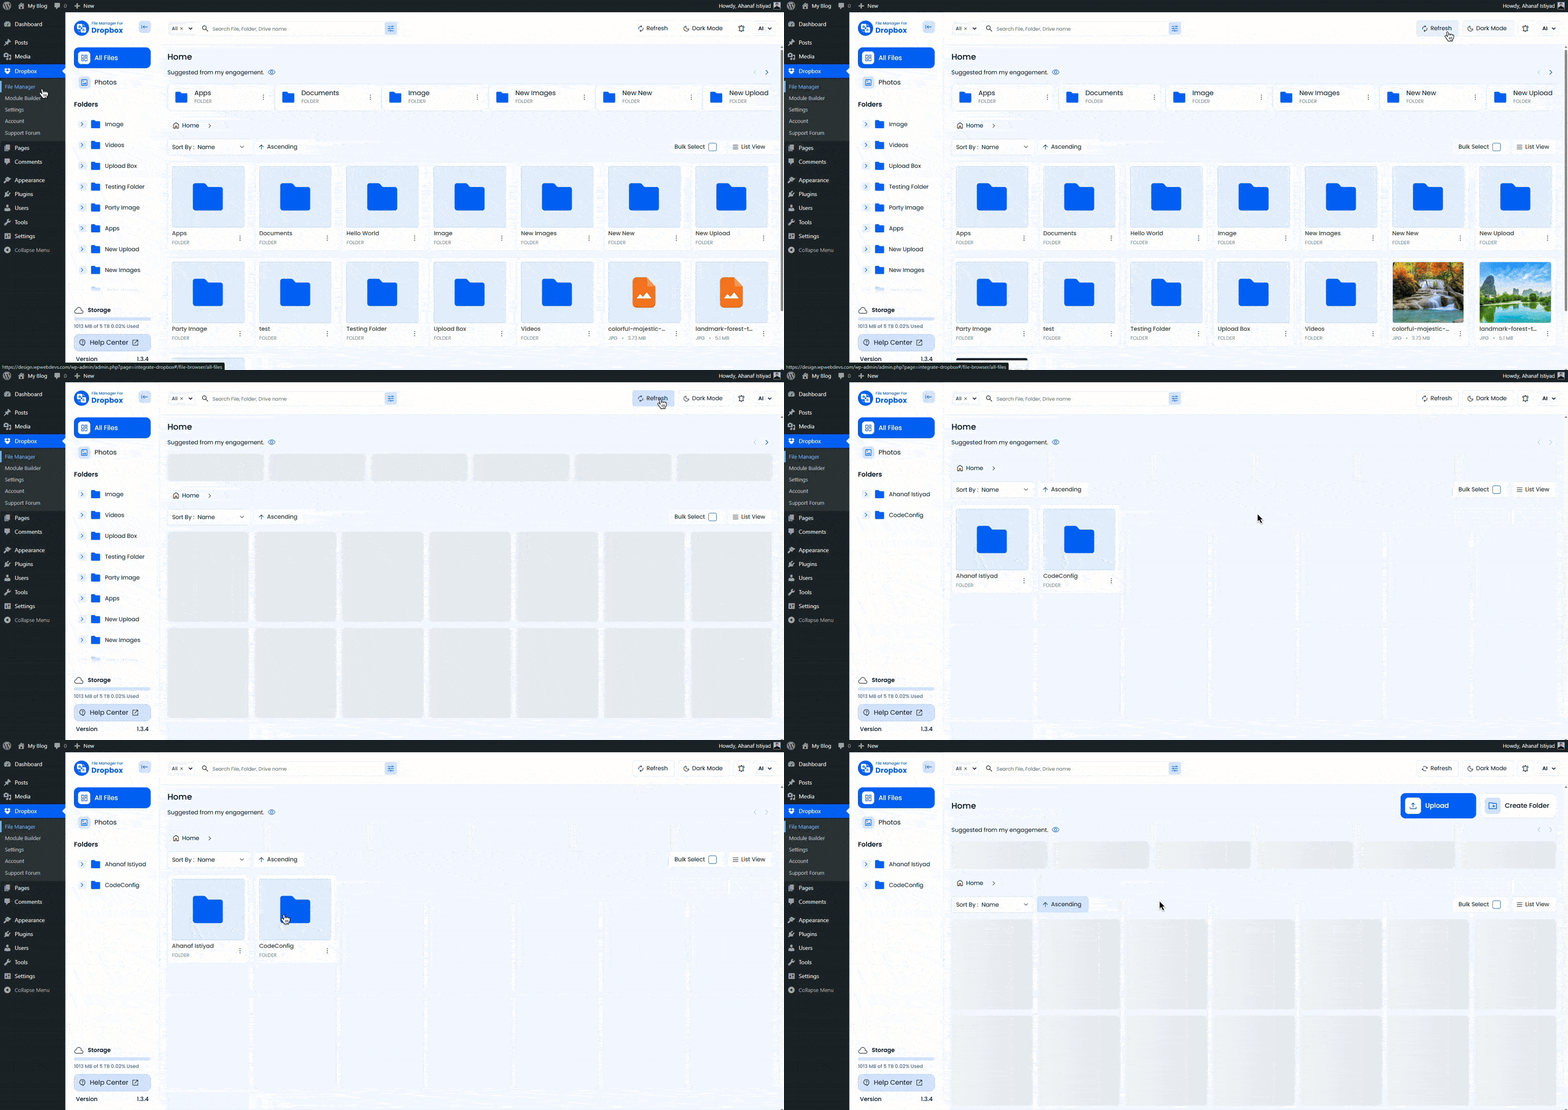
- Go to your WordPress dashboard.
- Open the File Manager for Dropbox plugin settings.
- Navigate to the File Browser or Dropbox connection area.
- You will see a message prompting you to sync your files and folders.
- Click the Refresh or Sync button to load your Dropbox Team Folders.
This sync action fetches all the available Team Folders and displays them within your WordPress dashboard.
Step 3: Reassign Your Shortcodes (Required)
If you had previously created shortcodes linked to standard Dropbox folders, you will now need to reassign them to the new Team Folders:
- Open the Shortcode Builder in the plugin.
- Update each shortcode to reference the appropriate Team Folder path.
- Save the changes and refresh your front-end pages to reflect the updates.
This ensures that all embedded file browsers, galleries, or media players are correctly connected to the new Team Folders.
Final Notes
DON’T WORRY! If you missed the files, you can reverse it by disabling the Teams settings.
Connecting Dropbox Team Folders gives your WordPress site collaborative file-sharing capabilities while keeping everything organized under one team space.
If you’re using the Integrate Dropbox plugin, this process helps you maximize its potential by securely managing shared content across teams without consuming your own hosting space.