How to Use Dropbox Images and Files in Tutor LMS?
Tutor LMS allows you to easily integrate Dropbox for adding shared assets such as images, videos, documents, and course materials. Follow these steps to learn how to enable Dropbox integration and use it effectively within your Tutor LMS courses. Also, You’re able to add an Intro Video From Dropbox.
Video Tutorial:
Step-by-Step Guide
Step 1: Activate Tutor LMS and Enable Dropbox Integration
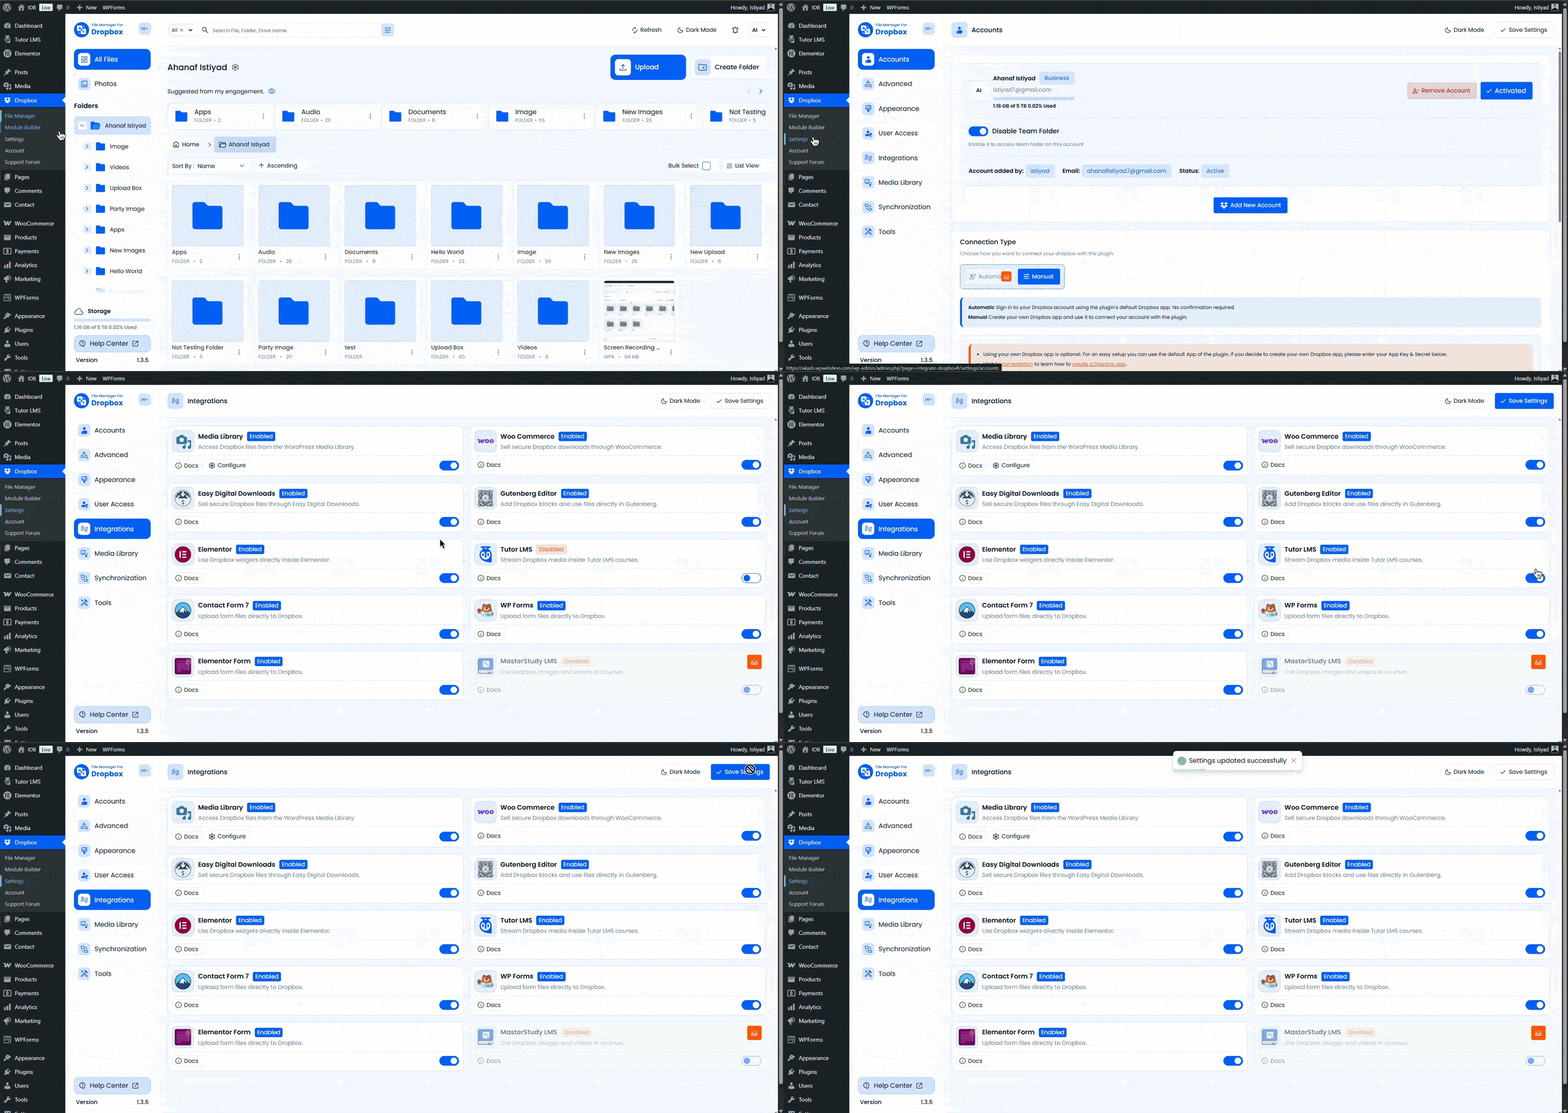
Before you can start using Dropbox in Tutor LMS, make sure that both the Tutor LMS and the Integrate Dropbox Plugin are activated and integrated. Authorize the Dropbox with your account safely and easily.
- Go to your WordPress Dashboard, navigate to Plugins > Installed Plugins, and confirm that Tutor LMS is active.
- Ensure that the Dropbox Plugin is installed and activated.
Tip: If you haven’t installed it yet, go to Plugins > Add New, search for “Dropbox Plugin,” and install it. - After activation, go to the Dropbox Plugin settings and enable the Tutor LMS Integration option. This will allow Tutor LMS to use Dropbox for storing and displaying course materials.
Step 2: Configure Dropbox in Tutor LMS Settings
Once Dropbox is integrated, you need to configure Tutor LMS to use Dropbox for video files and other course materials.
- From the WordPress Dashboard, navigate to Tutor LMS > Settings.
- In the settings menu, select the Courses tab to access course-related settings.
- Scroll down until you find the Video section.
- Under the Video Source dropdown, select Dropbox as your default option for uploading and displaying video content.
This will ensure that any videos you want to add to your courses can be directly linked from your Dropbox storage.
Step 3: Add Dropbox Files to Your Courses
Now that Dropbox is integrated with Tutor LMS, you can start adding images, videos, and other course materials from Dropbox to your lessons. Here’s how to do it:
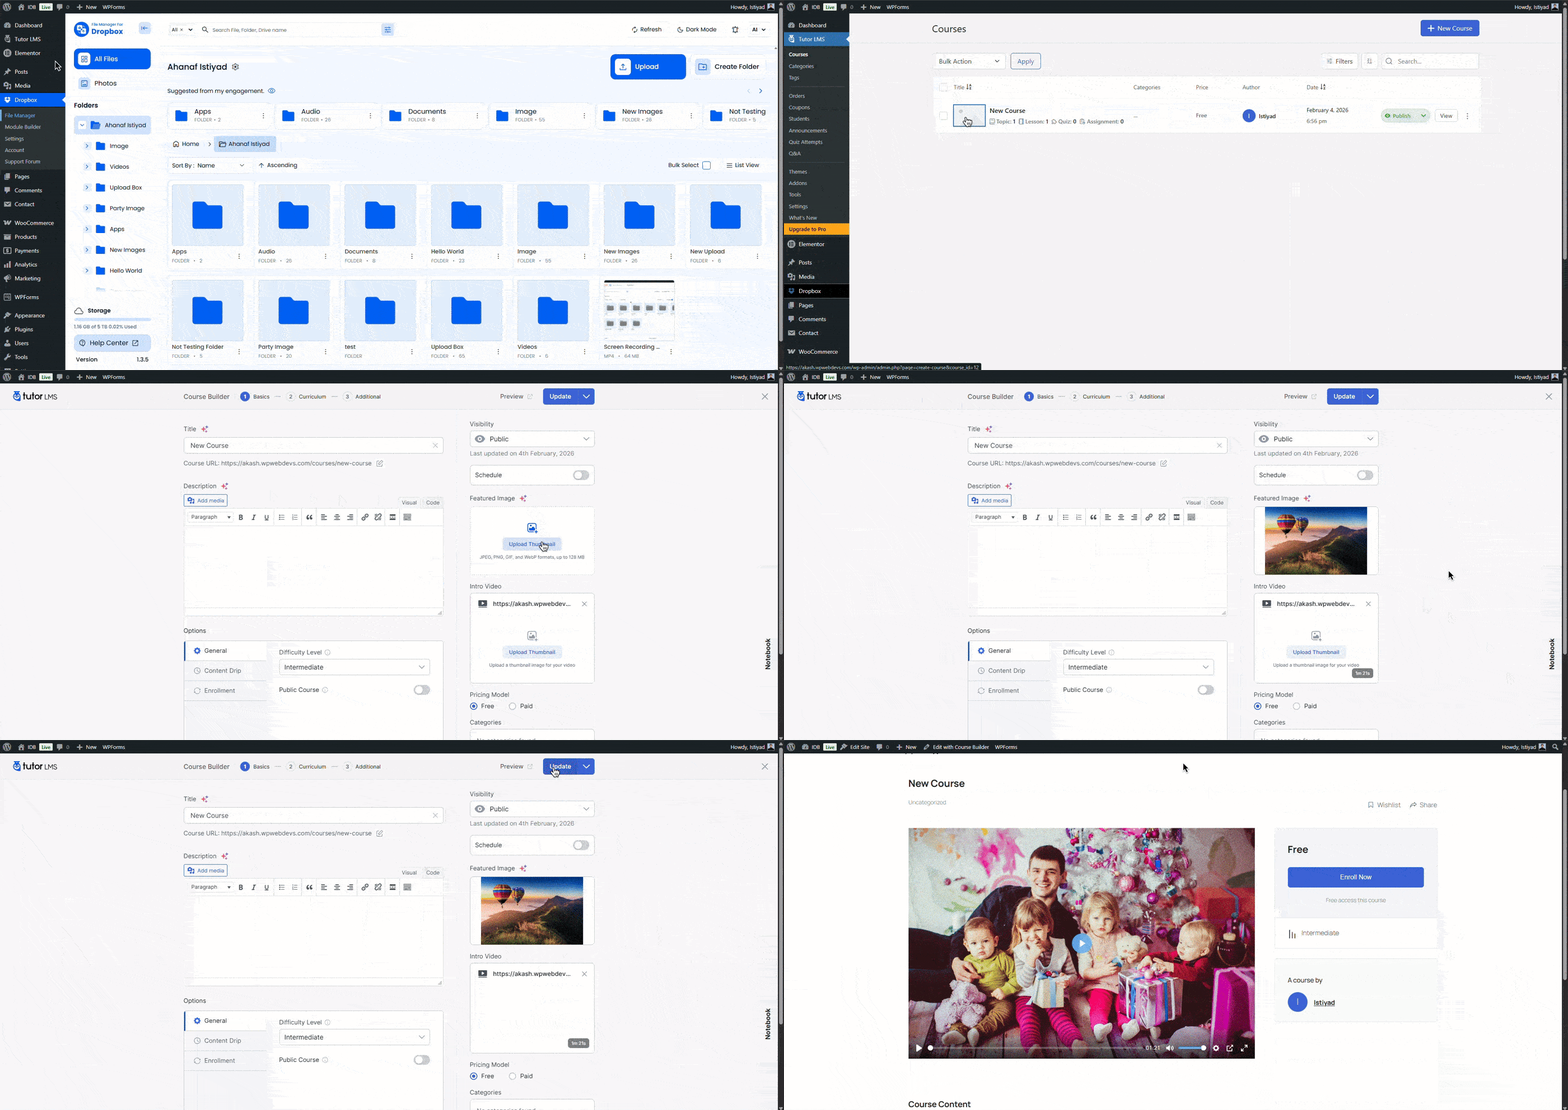
- Go to Tutor LMS > Courses and click on Add New to create a new course, or select an existing course to edit.
- Within the course editor, click on Course Builder to start building or editing the course content.
- Add a new lesson by clicking on Add Lesson, or edit an existing lesson.
- To add a featured image, course materials, or videos:
- For images: In the Featured Image section, click on the Upload Image button. When prompted to select a file, choose the Dropbox option to browse and add images directly from your Dropbox account.
- For videos: Scroll down to the From Video section and select Dropbox as your video source.
- For other course materials: Look for the Course Materials section and click on the Add Dropbox Files button. This will allow you to browse and attach files from Dropbox, such as PDFs, Word documents, or other materials relevant to the lesson.
Step 4: Publish Your Course
Once you’ve added all the necessary course materials from Dropbox, don’t forget to publish your course. You can do this by clicking the Publish button in the course editor. After publishing, your students will be able to access the images, videos, and documents you’ve uploaded from Dropbox as part of their learning materials.
Additional Tips:
- Ensure a stable connection: When adding large files, such as videos or high-resolution images from Dropbox, make sure your internet connection is stable for faster uploads.
- Organize your Dropbox folders: Keeping your course materials organized in specific folders within Dropbox will make it easier to find and upload the right files to Tutor LMS.
- Test the course: Before making the course live, preview it to ensure that all Dropbox files load correctly for students.